
My first solo exhibition took place in November 2017 at the Talbot Hotel in Wexford, Ireland. It's taken me absolutely ages to get all of this out of my head and into a blog format.

Decision to Exhibit
For a long time I had wanted to have an exhibition in my home town of Wexford during the Opera Festival, when there is a fringe festival with art exhibitions throughout the town. This is usually from mid-October to the beginning of November. However, living in Kuala Lumpur made that more difficult than it would otherwise seem. I made the decision in February 2017, about eight months out. I decided that for my first exhibition that I would monitor all of the costs, and did not want to exceed €1,500.
A lot of what I did was based on Phillip Calloux’s blog at http://photsy.com/blog/?p=484. He has documented what he had done in extreme detail in order to create an exhibition, and I found this immensely helpful.
Venue
First and foremost a venue is required. I emailed several potential venues in Wexford town. Many had exhibitions are booked more than a year in advance so this wasn't as straightforward as I'd anticipated. Fortunately, I was able to share a space with a local artist at the Talbot Hotel, where they normally have four or five exhibitors. The price of €390 for one week was acceptable so I went with this and booked.
Once the venue is secured, next step was to decide on which photos I would display. With this question came a host of others. What size should they be? What theme would I select? What aspect ratios?

Curation
In July I decided to put out the selection process to a vote on Facebook based on an initial selection of photos that I narrowed down. 12-14 people responded and I had a picture of what was popular. This was further whittled down to about 25 or so. I had initially intended on showing B&W alongside colour photos, however, on advice from a KL photographyer I decided to go with just colour and exhibit monochrome images as just mounted in cellophane.
It was in July, while at home in Ireland, that I discovered Strand Framing in Cork. They had insisted that they could prepare frames and print the photos. Framing and printing prices were very reasonable and everything is done through an online portal. I had called them during summer and had a good chat about the ins and outs and they recommended that I assemble the frames myself. Happy in the knowledge that they would print, I sent them a few photos to compare different paper types to be printed at 6” x 4”. These came back but were really too small to decide.
After returning to KL I was extremely busy with work and a conference I was organising, and the exhibition had to take a backseat temporarily. I managed to whittle down my selection even further but still not entirely satisfied with what I had and made some late changes to the lineup. The final lineup is shown below, for framed only, and also a further set to be colour and monochrome, which would be mounted and in cellophane.

Printed images
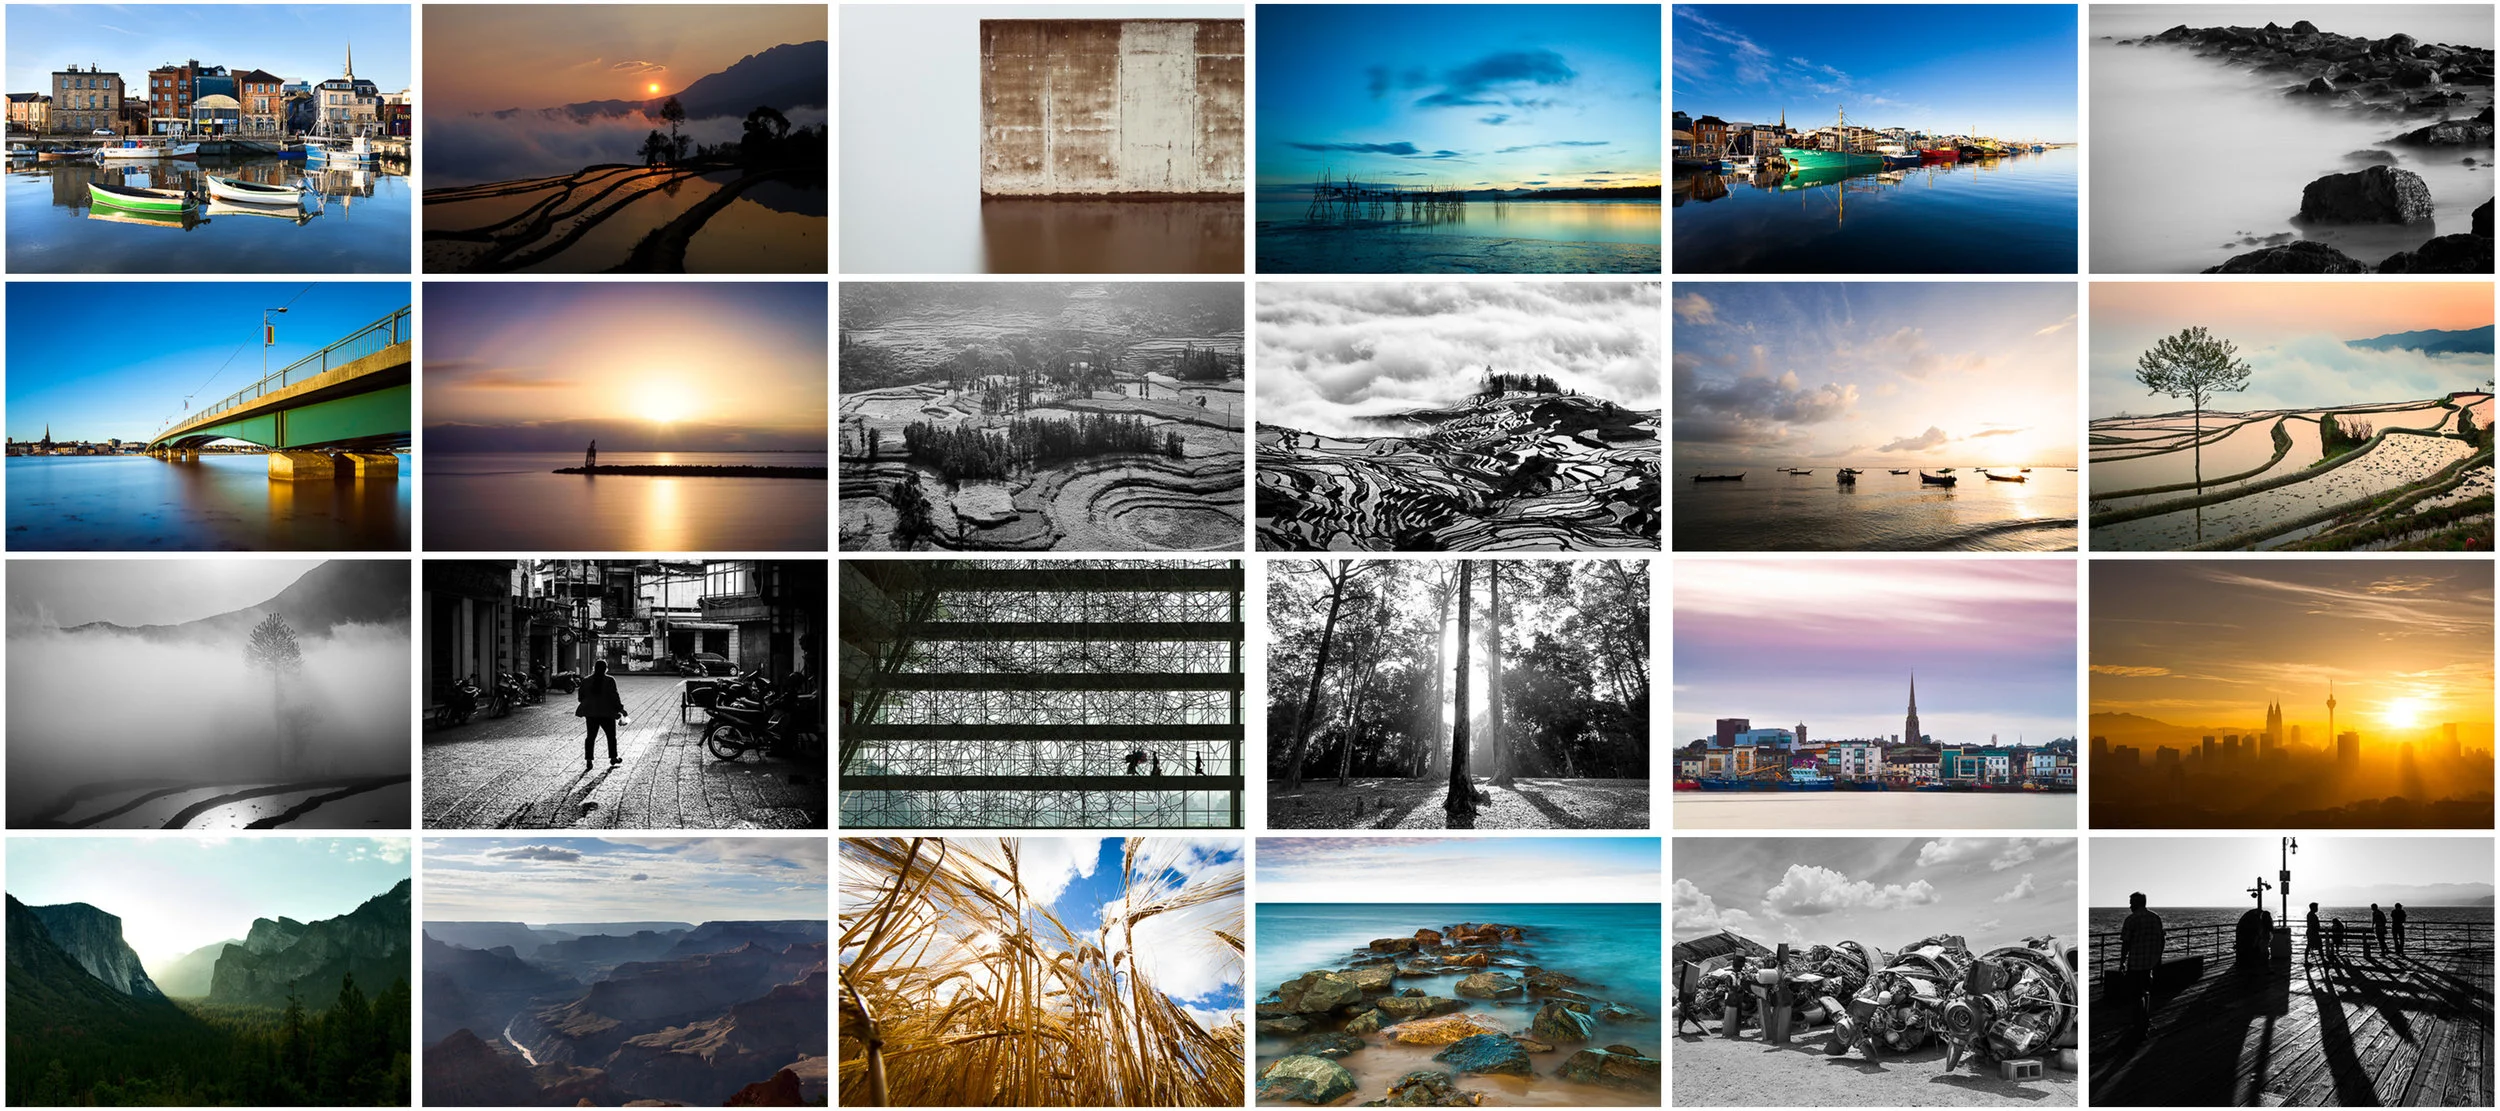
Mounted images
Preparatory Work from Kuala Lumpur
I developed a flyer that I was quite happy with. This took an evening at home on Photoshop and was quite satisfying. The design was simple, however, it was pointed out by Claudine that I should have included some contact information on it. This was quite an oversight really. The flyer used is below. Printing of this in Kuala Lumpur cost €30 for 100, which I distributed around town.
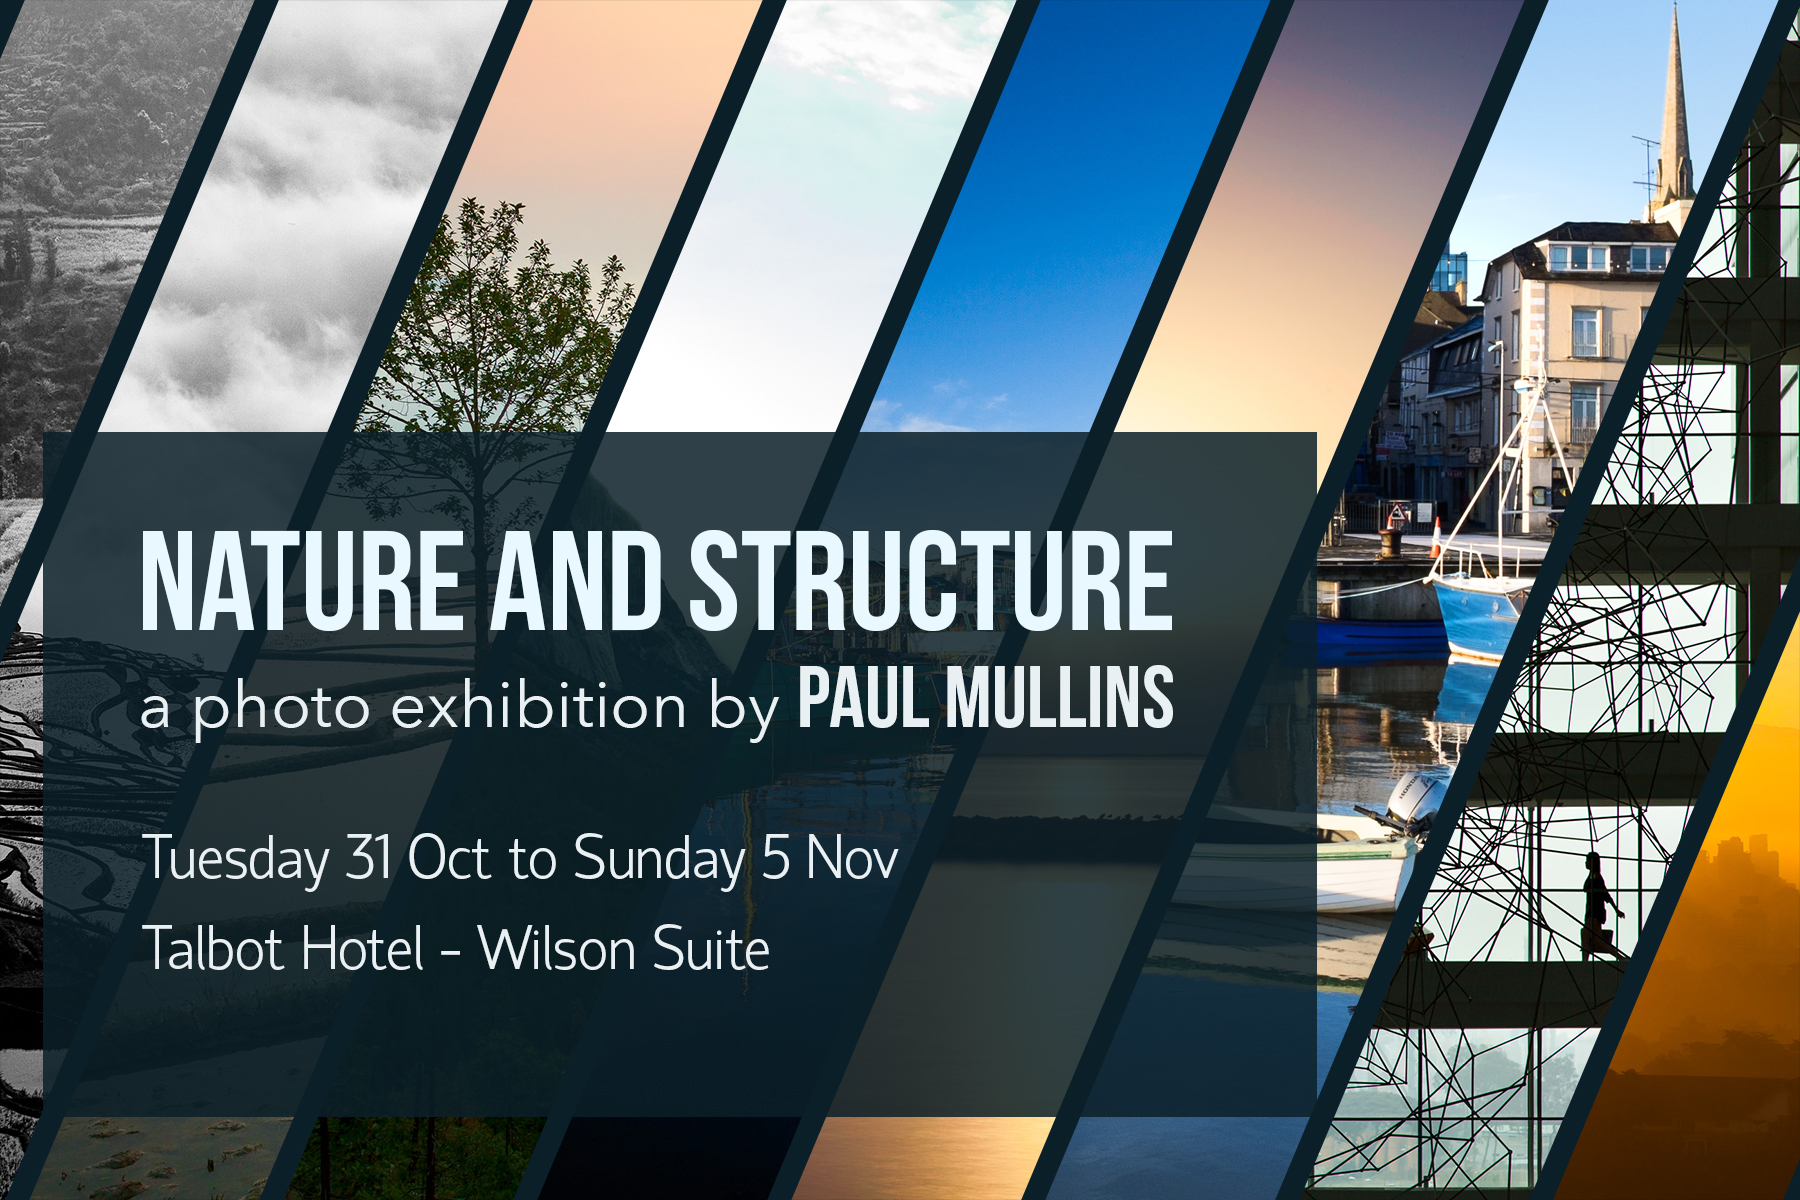
Event Flyer
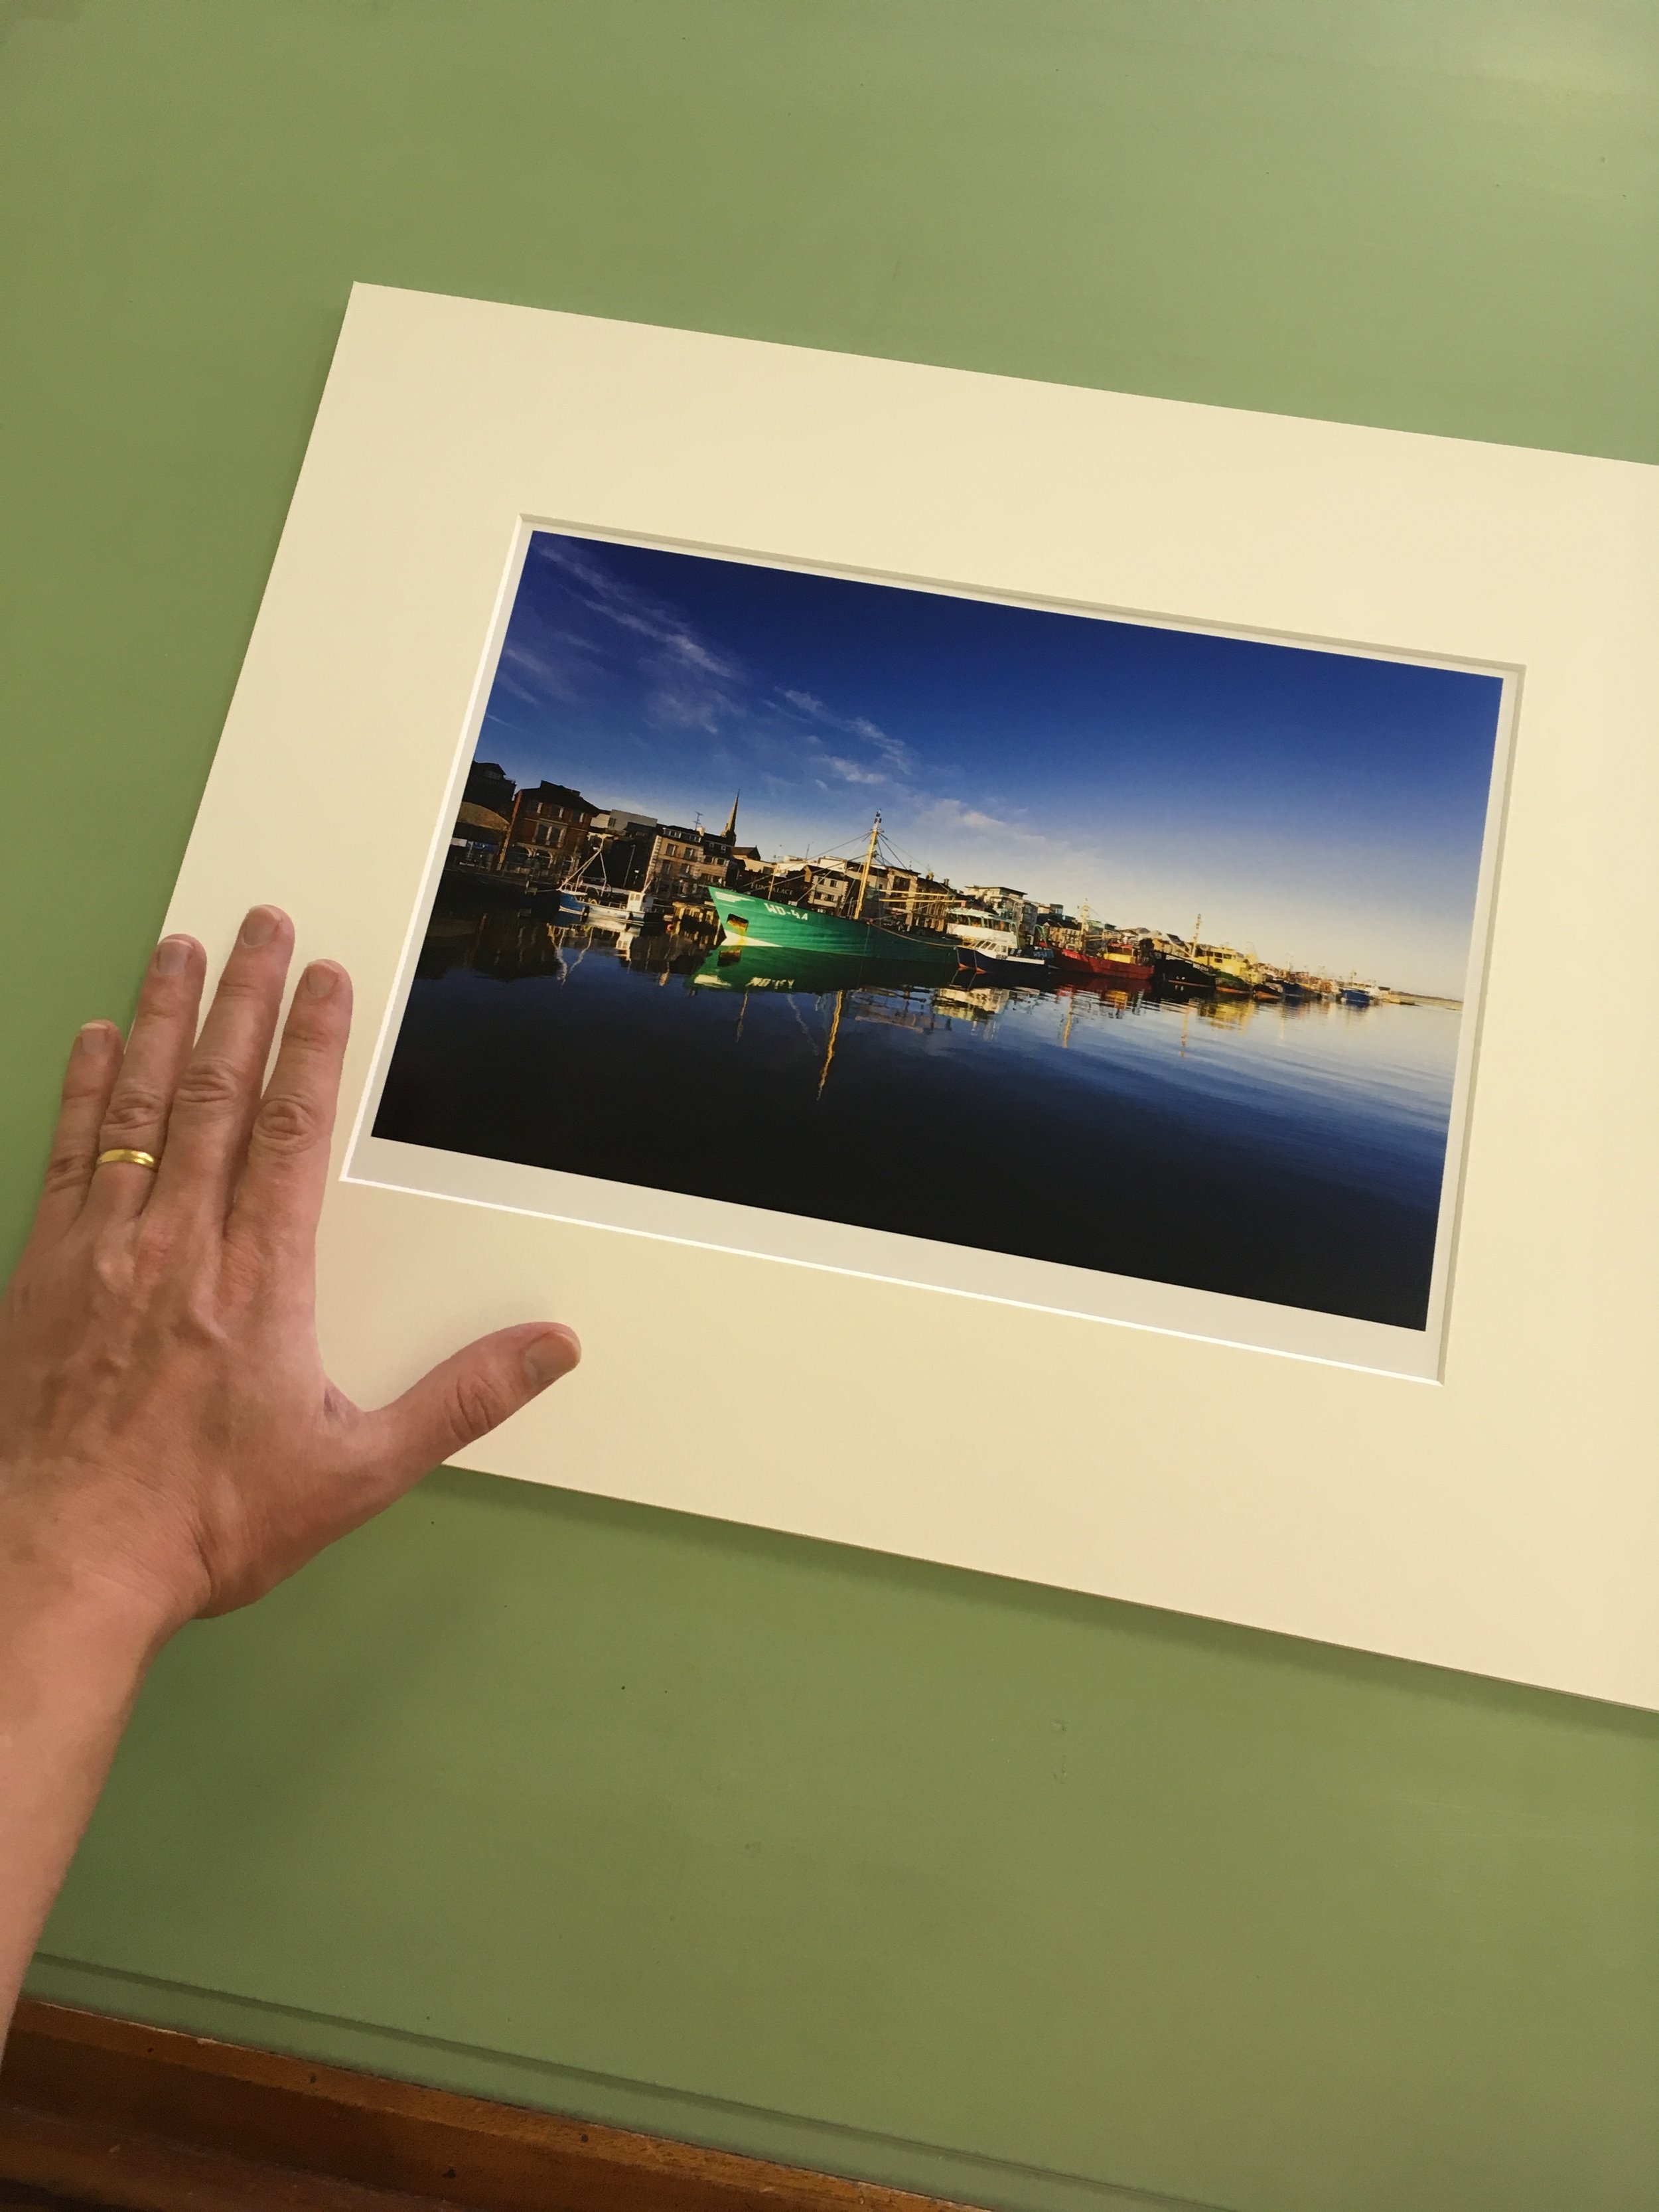
I really left the final ordering of the photos and frames a little too late and was rather panicky at the end as my time float was less than it should have been. Once I had made my final selection of photos, based in the end on Ming Thein’s advice not to mix colour and monochrome, I uploaded to Strand Framing’s website. I made the final upload and frame selection the following evening, choosing a typical frame size of 500mm x 400mm (~ 20” x 16”), which was based in part on the size of the room. The frames I opted to maintain the same photo and frame area for all of the photos, which resulted in 330mm x 220mm for the 3:2 aspect ratio photos. The price of a 500mm x 400mm was €22.52 + VAT, which included front and rear mat.
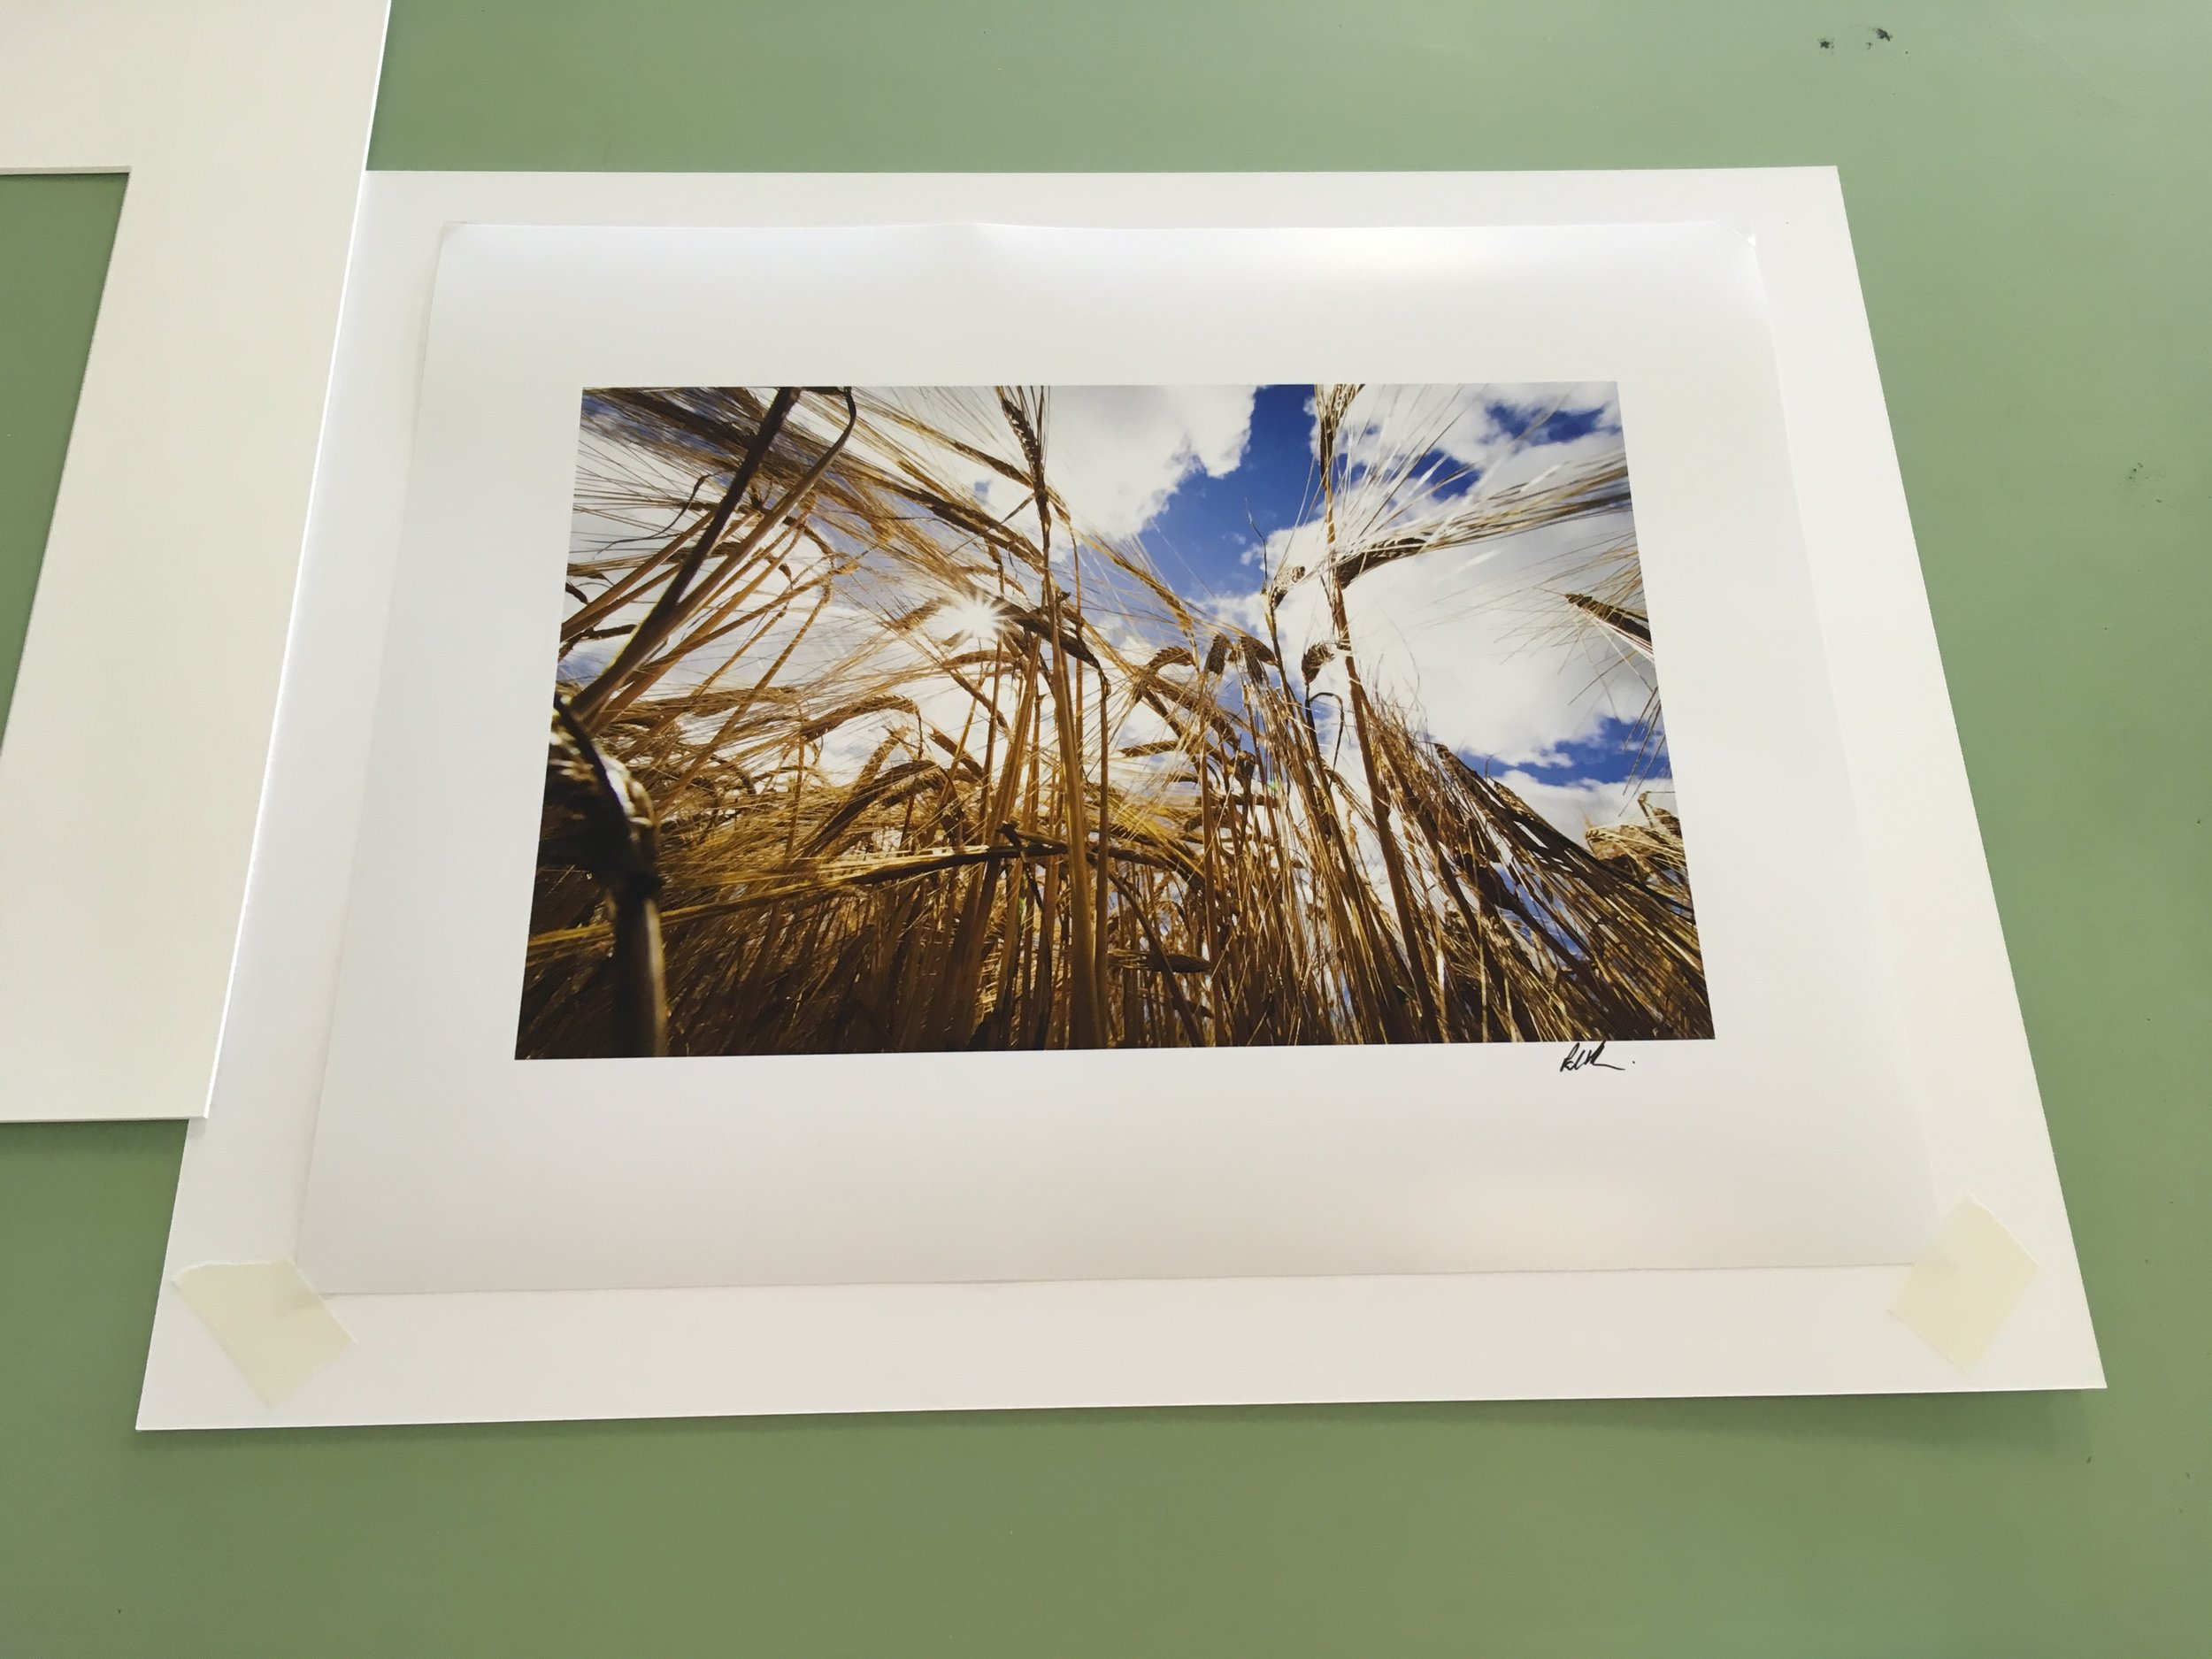
I received correspondence from Strand Framing that they were having problems with posterisation when printing the photos at full size and asked me to check the files for three specific photos, that contained rather saturated blues. I could not see any problems on the screen and decided to investigate further what the problem could be. Over processing was the only thing I could think of and found a solution at nomorebanding.com, which I implemented on the suspect prints. I re-sent the photos at maximum resolution and waited. In the meantime I contacted Wesley Wong at Giclee Art in Kuala Lumpur, who maintained that there should have been no problem in printing the files. Strand Framing discovered the root of the problem, that there was a compression issue uploading the files to their website, which they had solved. However, at this point I decided to cancel the printing order with Strand Framing and use Wesley Wong in Kuala Lumpur who I have used many times in the past. Although this created the additional problem of transporting the prints back to Ireland. Wesley did a fantastic job in an extremely short time frame, using archival inks on archival semi-gloss paper and, following some expert packing from Wesley, I was able to use a cheap €13 folio drafting bag for transportation.
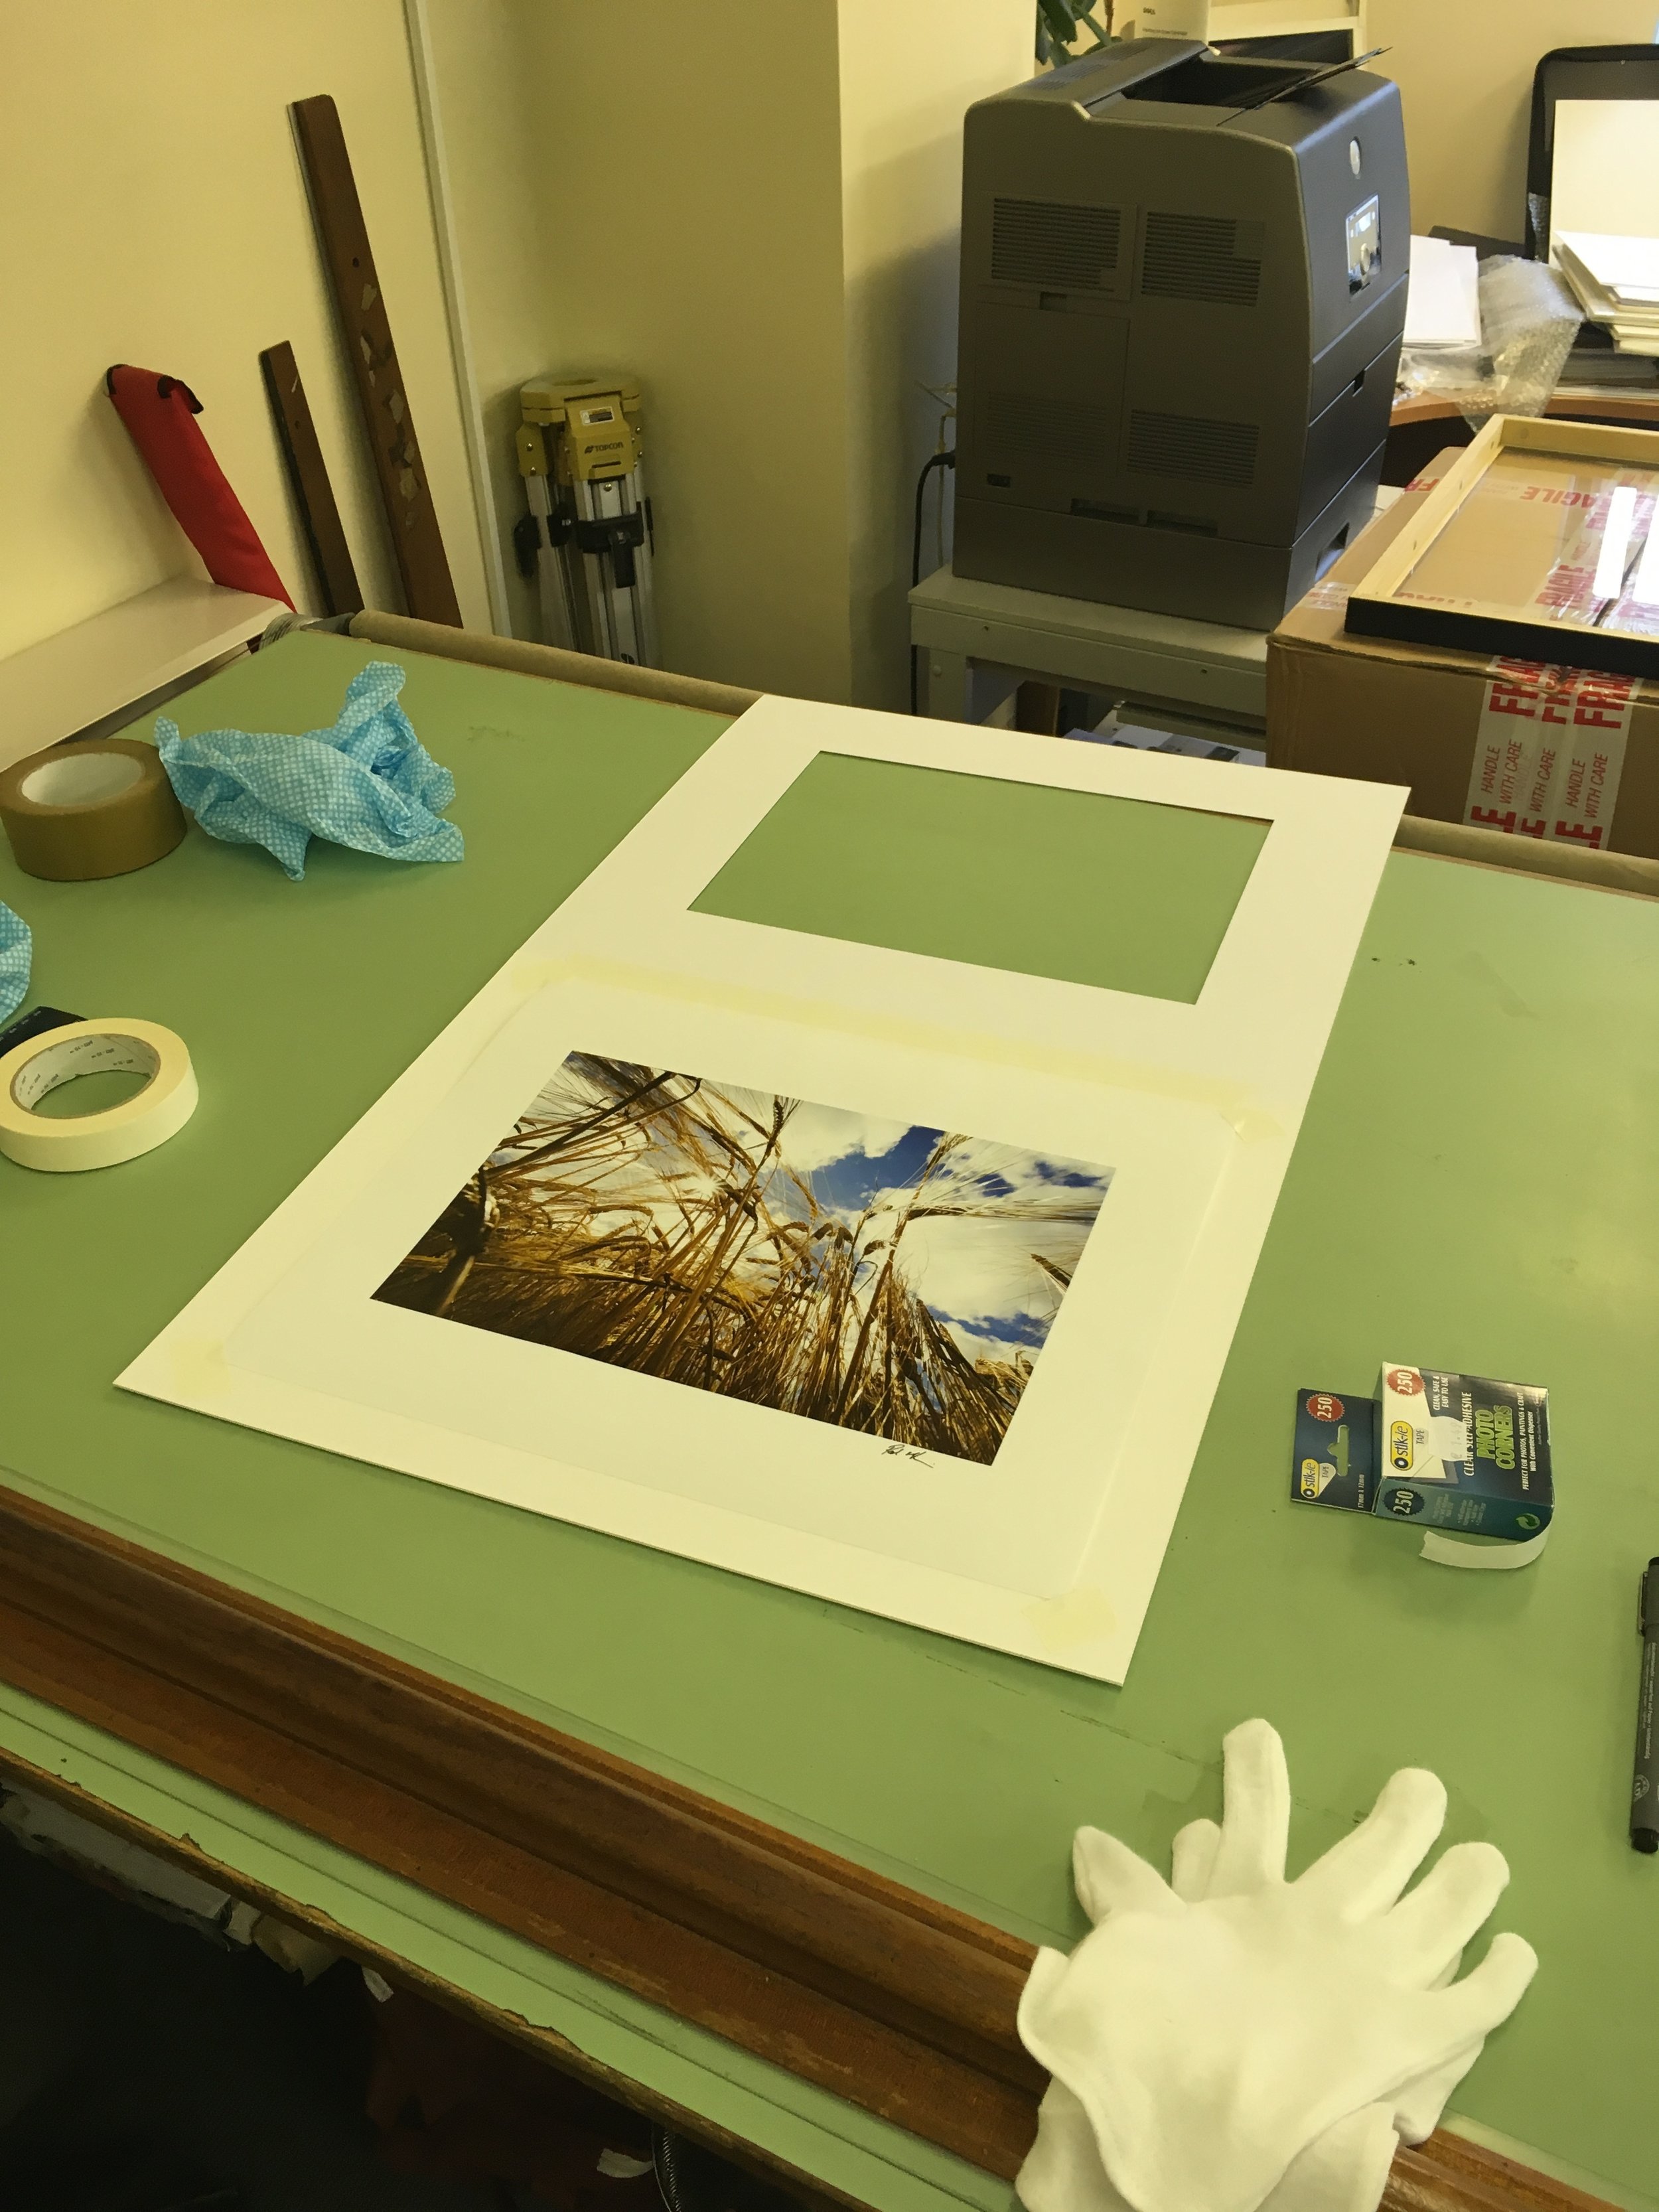
In addition to the printed photos I decided to do mount only photos of all of the framed photos plus an additional 8 monochrome images. These photos were printed at the same size as the framed ones. I had an error in the printing. I had incorrectly considered the aspect ratios for two photographs resulting in two wasted frames that could not be used. Fortunately there was a spare frame and one considered twice. It was Wesley Wong who noticed the error in the end. All in all, including GST, the price for the prints was €251.26, which worked out at €5.58 per photo.

Frame dimensions. All dimensions in mm.
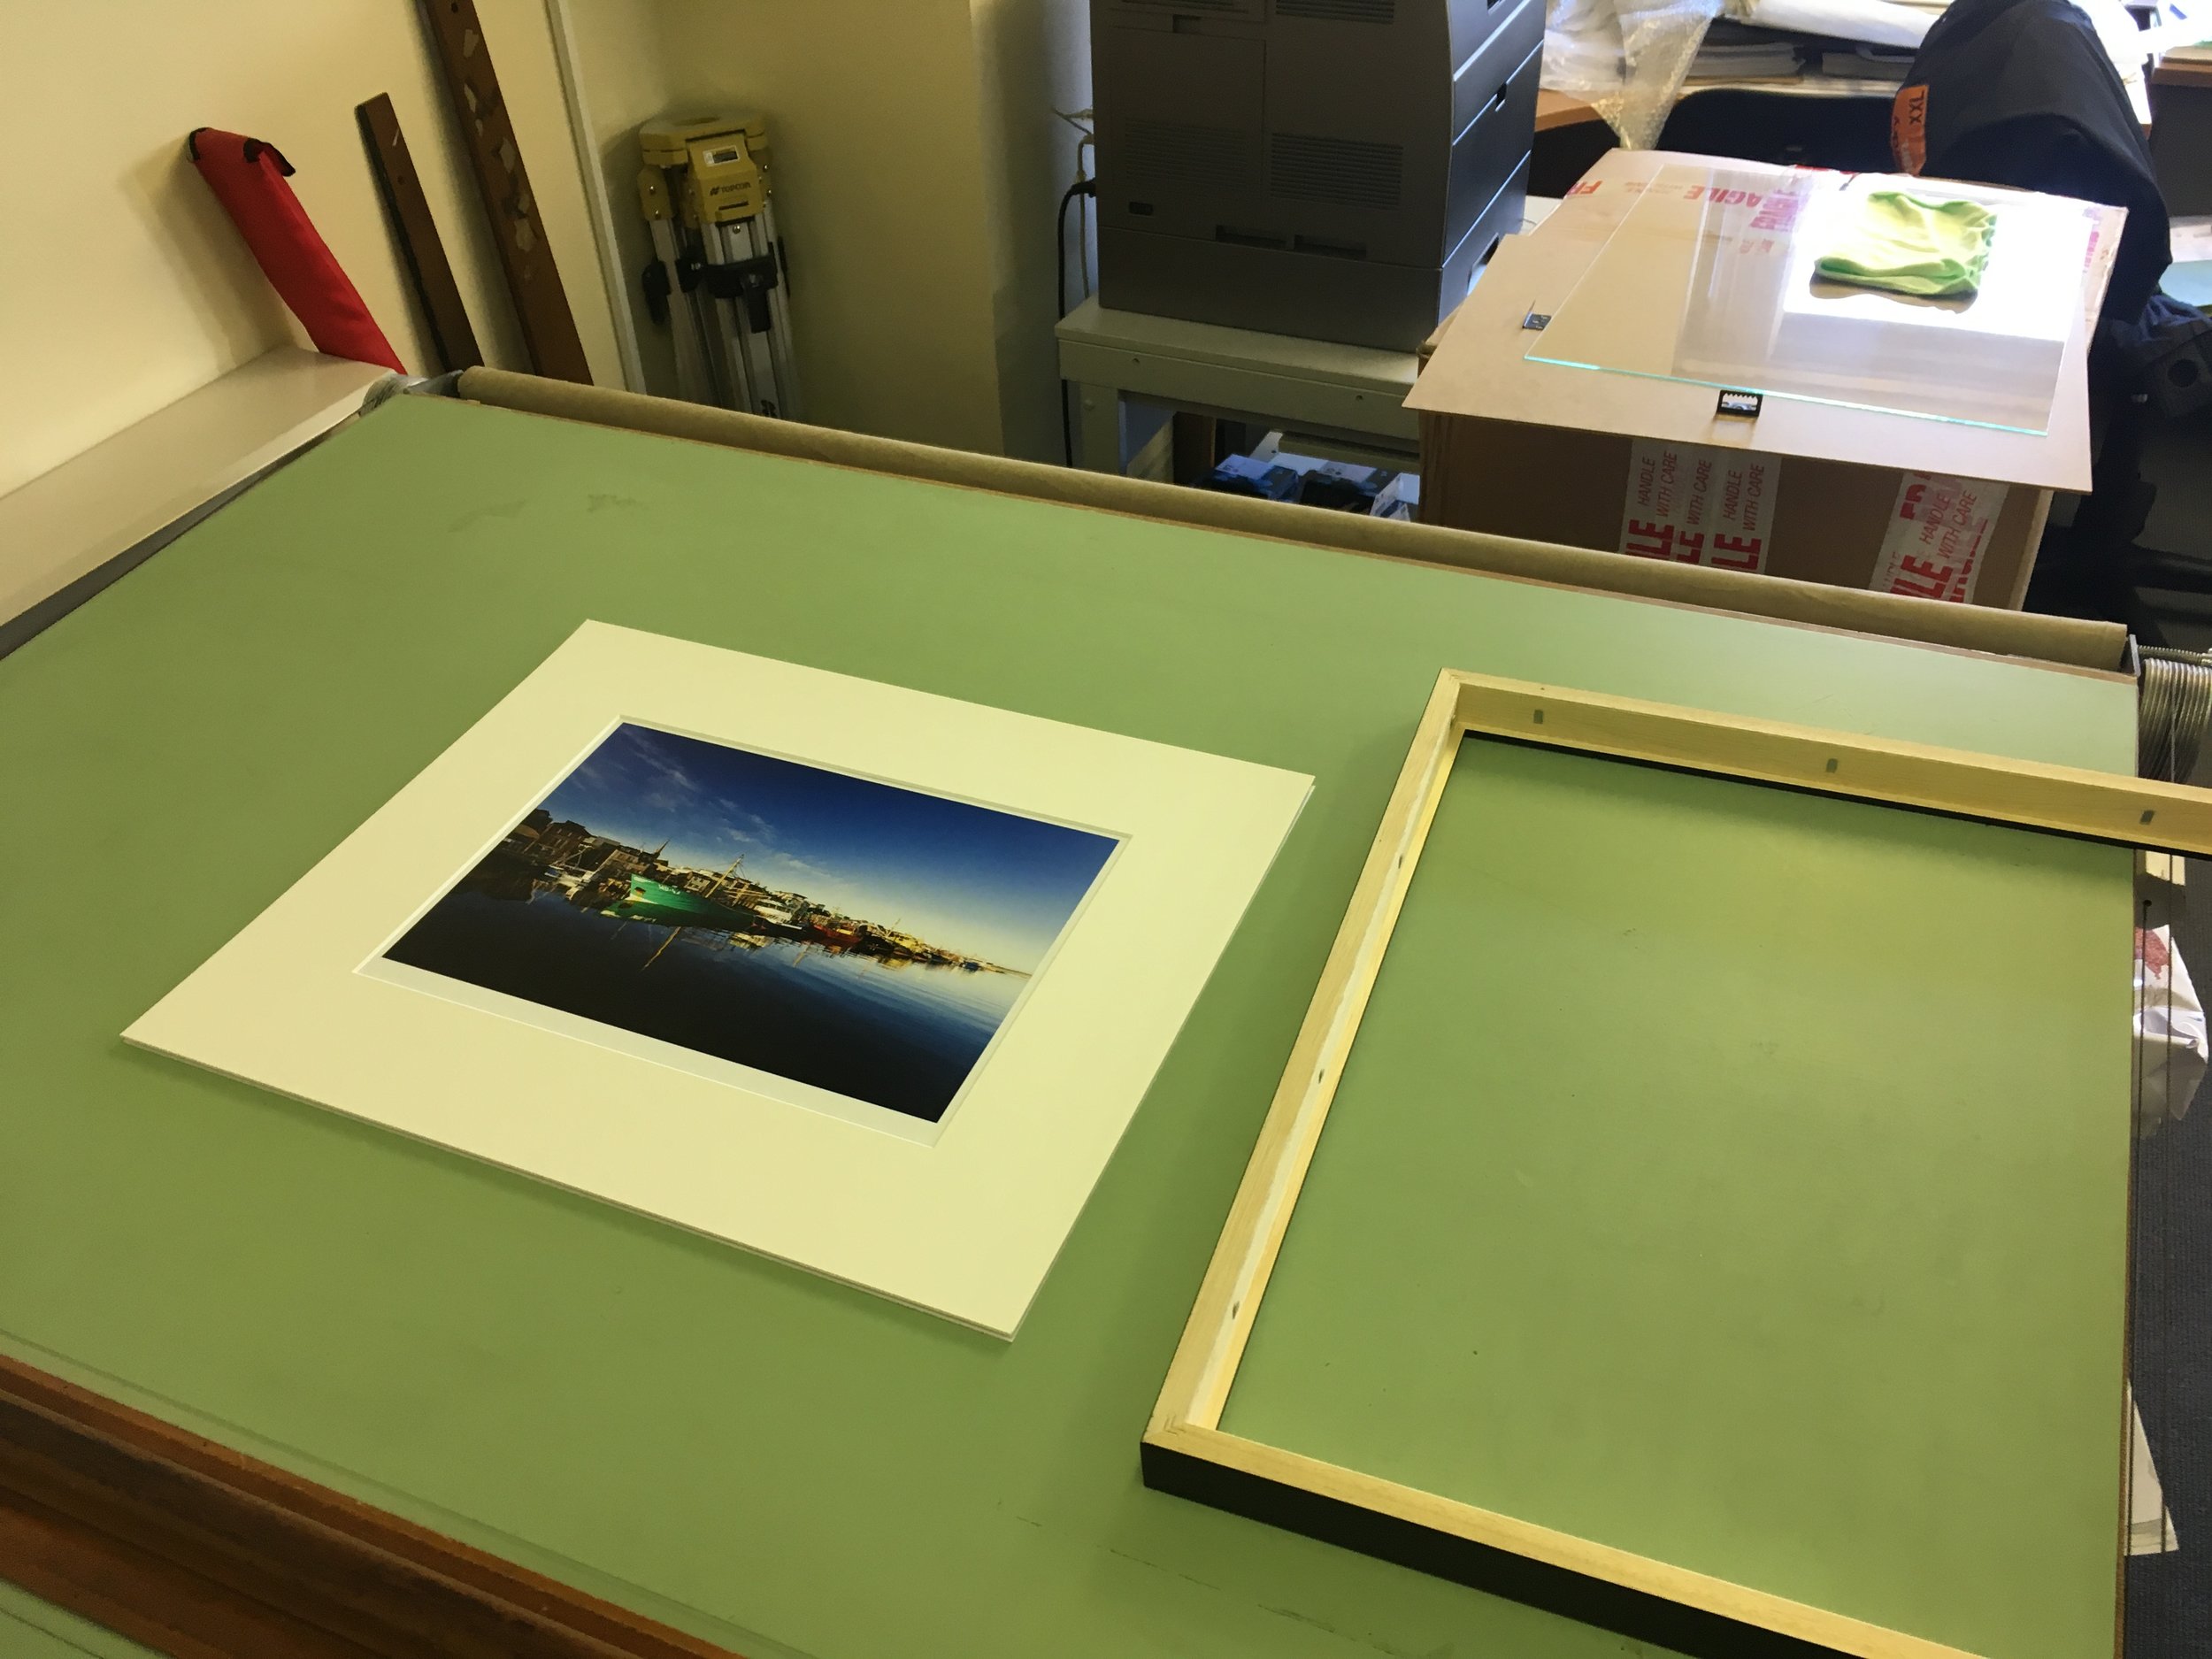
Framing the Photos
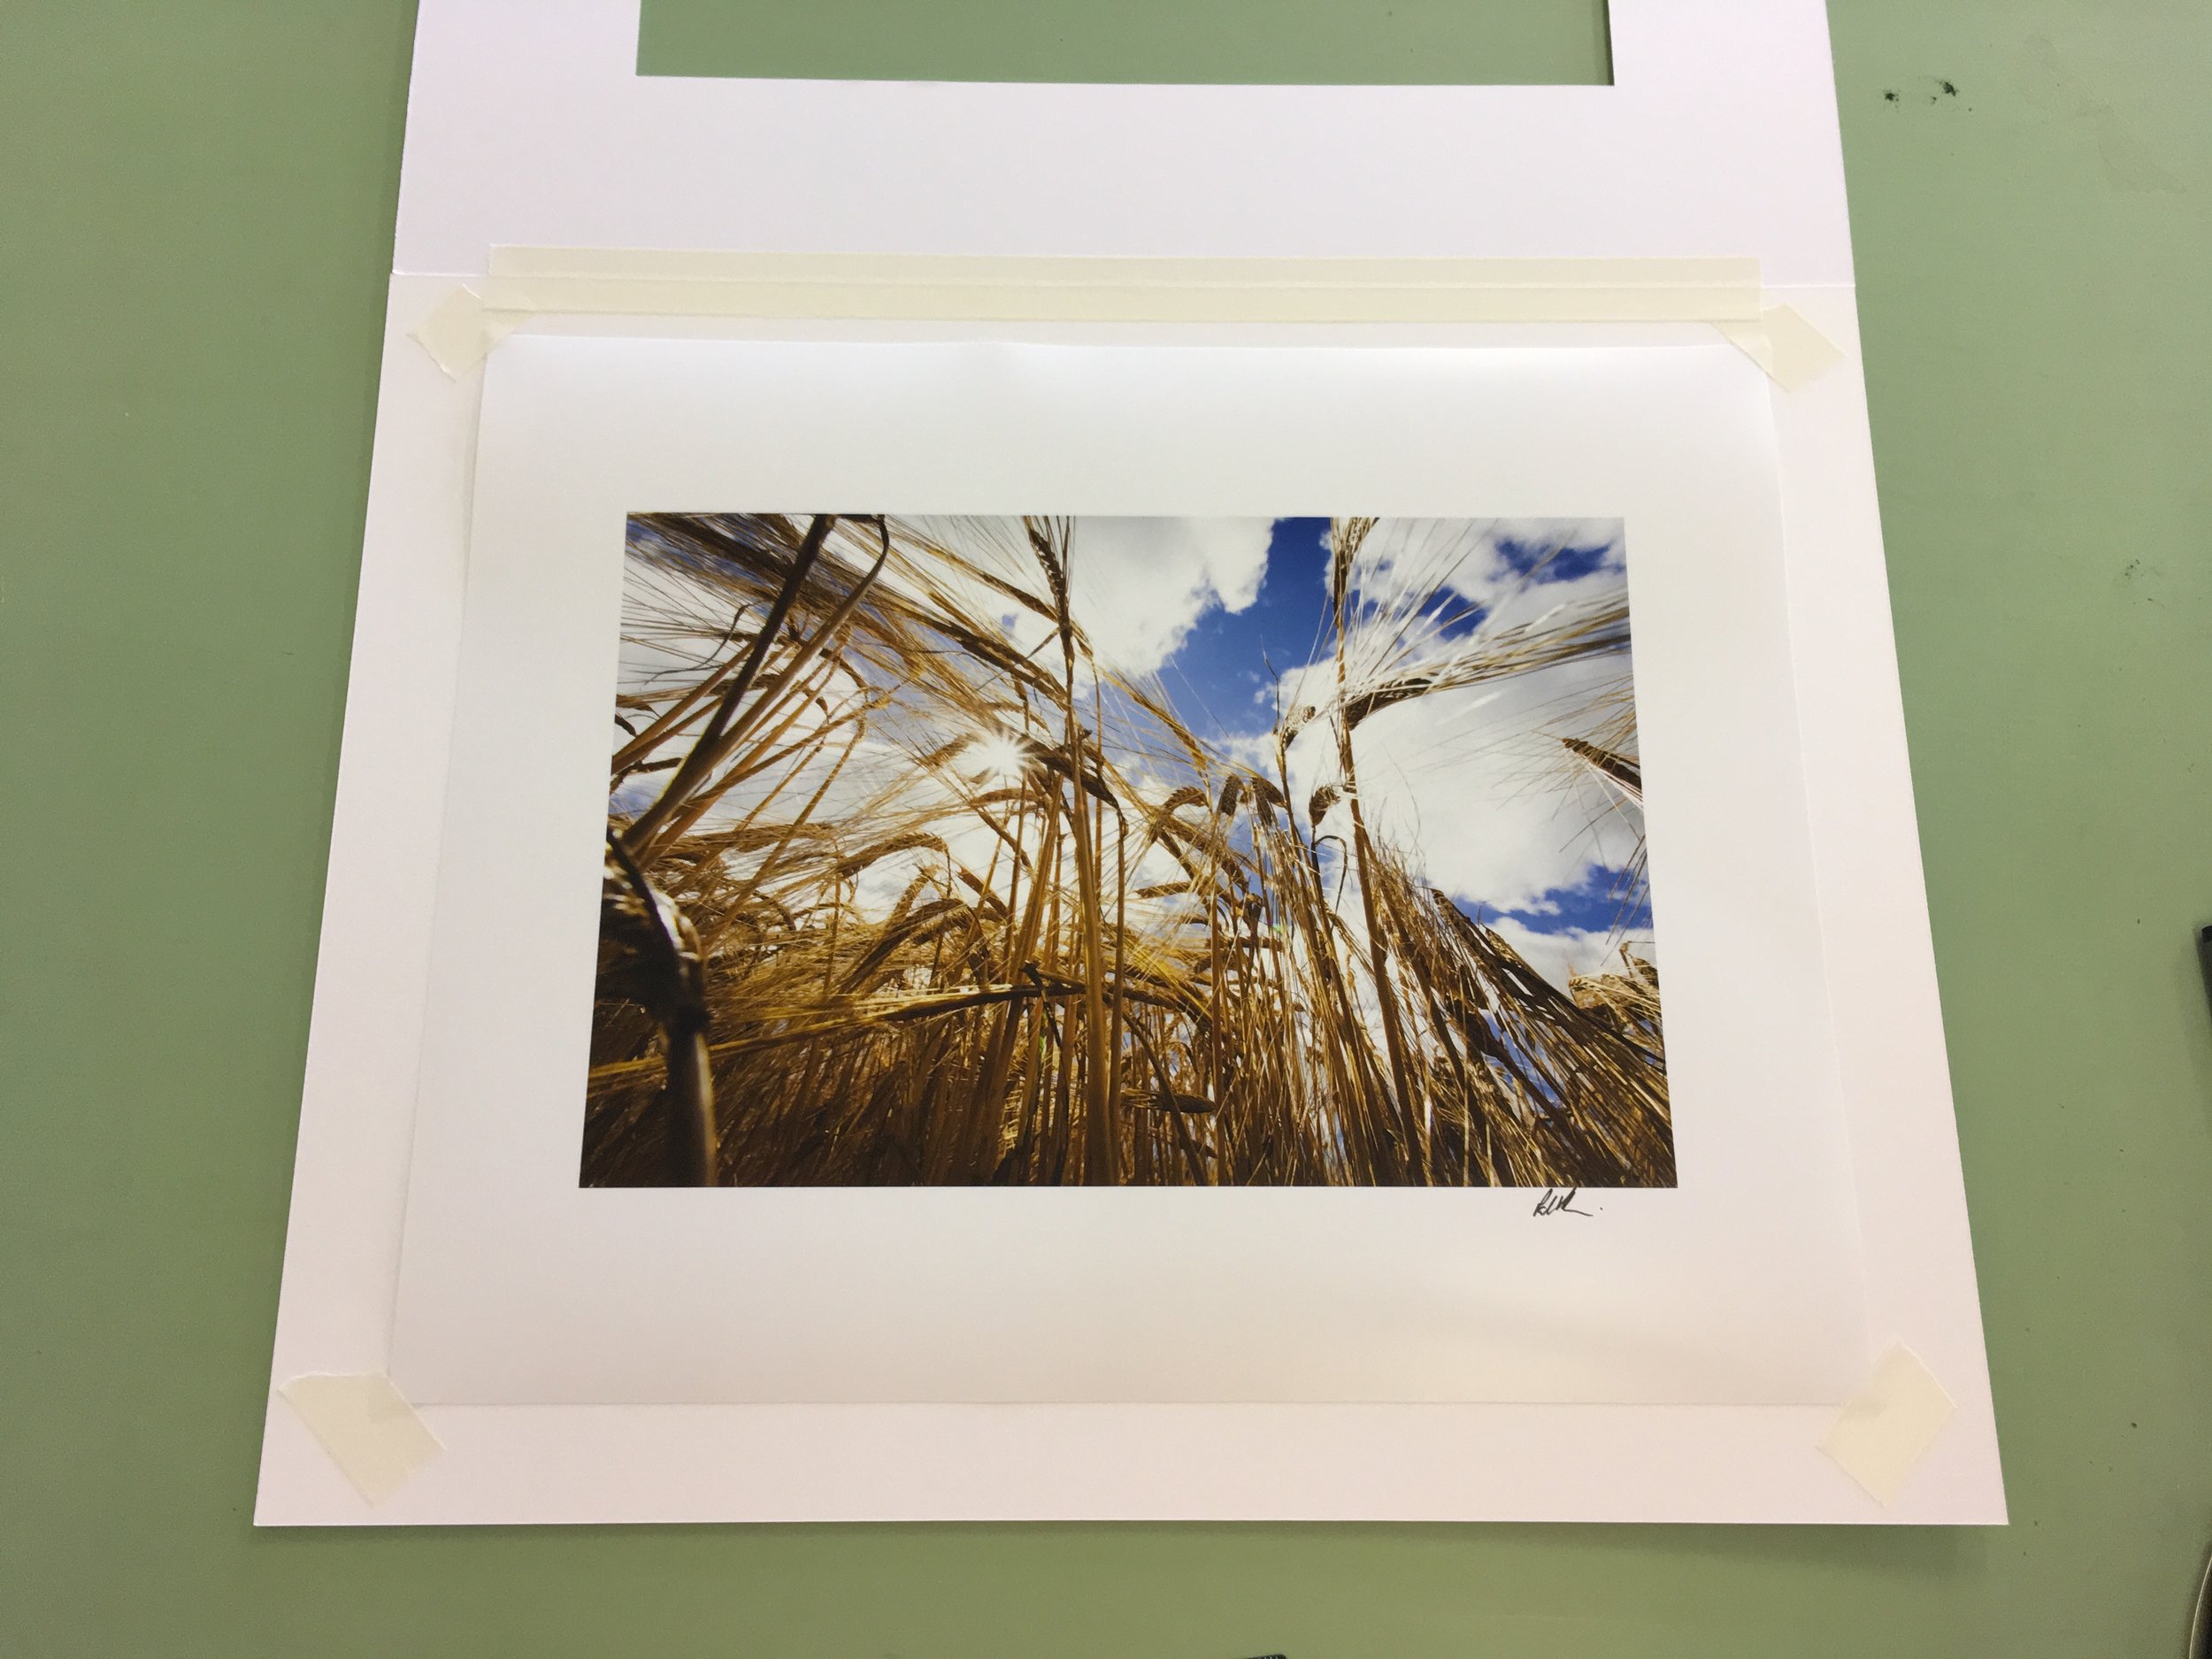
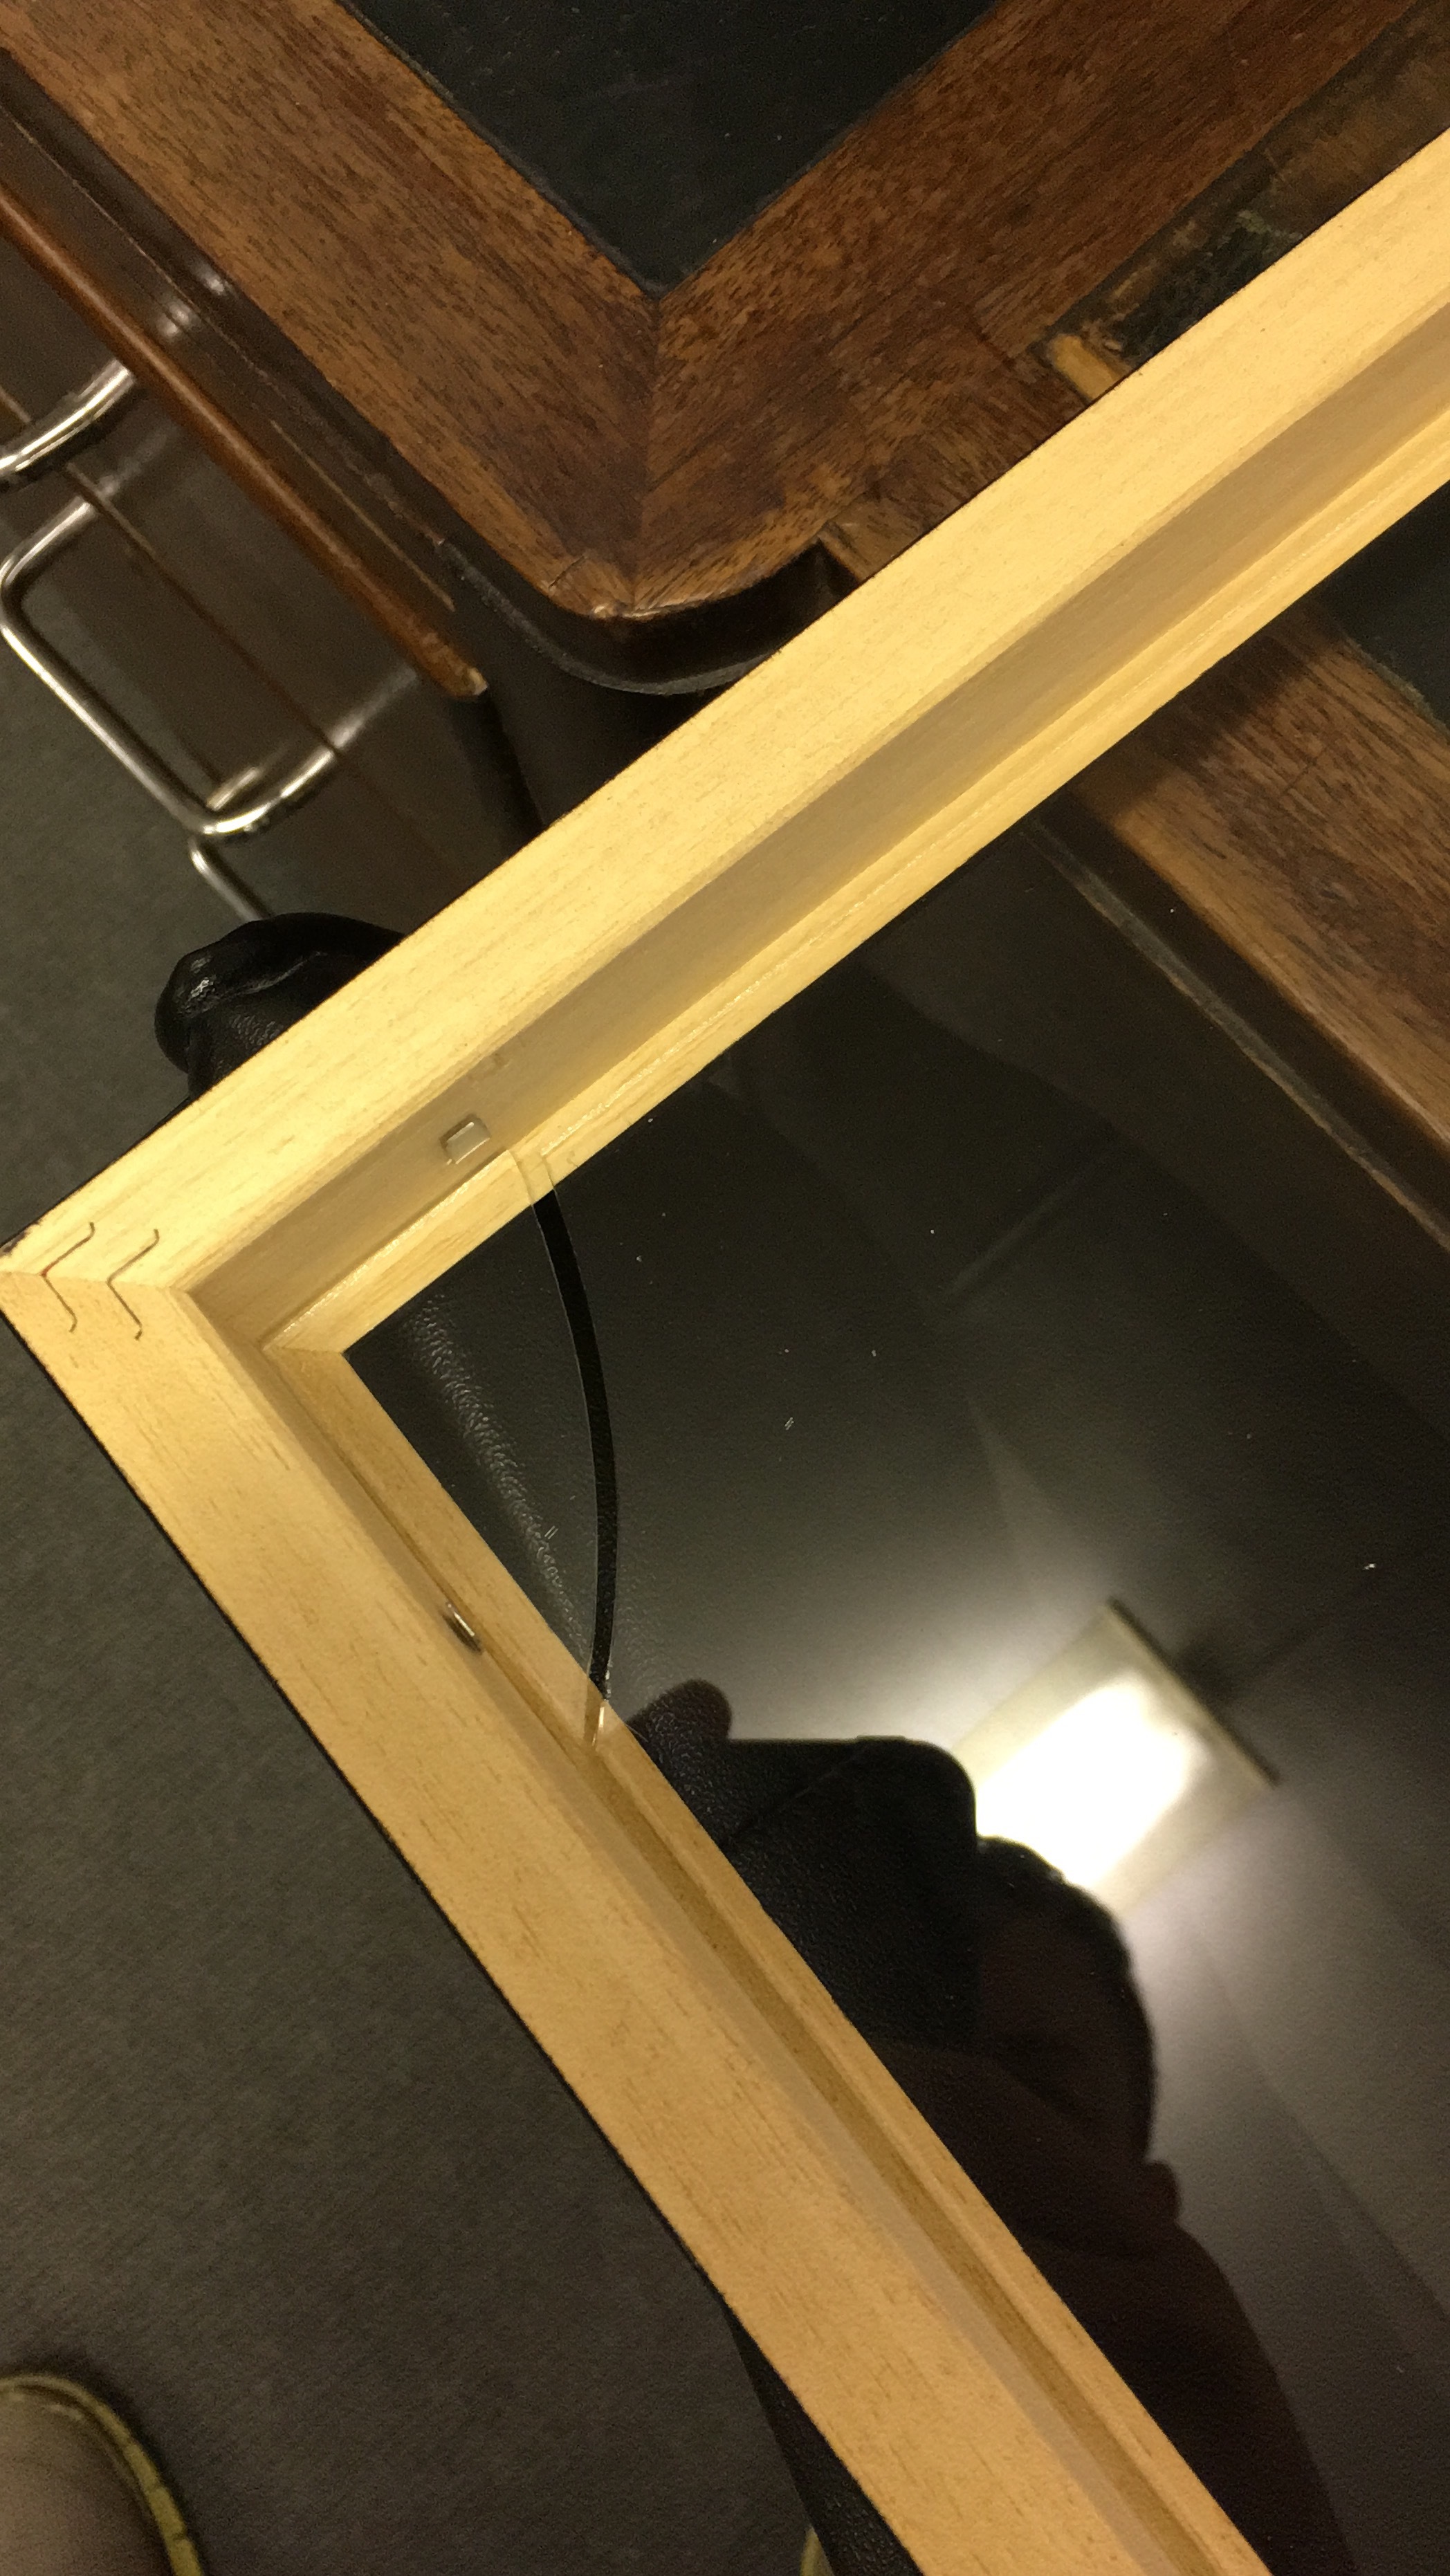
The actual framing of the photos was rather therapeutic, and once I’d gotten the hang of it, only took about 20 minutes per photo. If I were doing it again I would get a bottle of windowlene or similar to clean the glass more thoroughly. I had one accident with the glass early on which made me overly cautious from there on in. Using ans old drawing table was perfect for the job and was plenty of space to do it. I think that even for larger prints it would been perfect. Cheap cotton gloves that I’d purchased were essential. A pair of rubber gloves might have been better for cleaning the glass though. Assembling the mounted photos was a piece of piss, after a couple it’s easy to position the photo within the mount. With the front mat and the backing mount the easiest thing to do is to create a hinge along the top edge using PH7-70 acid free tape. Align each side of the mount and run a length of tape connecting the two, then fold over, reposition if necessary, and flatten to make sure the tape has taken. This is available in a double sided tape but I couldn’t find it. In any case, creating a hinge is probably essential anyway. Once the photo is positioned by eye, I used the PH7-70 tape as a quasi-weight (it seems like hacky sack kind of weights are available especially for this purpose) to keep the photo in position before lifting the mat back up again. Using photo corners, I stick the four corners into place ensuring there is a little tolerance in case of expansion or contraction of the photo relevant to the mount. Then use more PH7-70 tape to make sure the photo corners are permanently stuck in place. I didn’t have much confidence in the backing glue of the photo corners. It was fortunate having my father’s office as a base to store frames and photos and actually assemble everything.
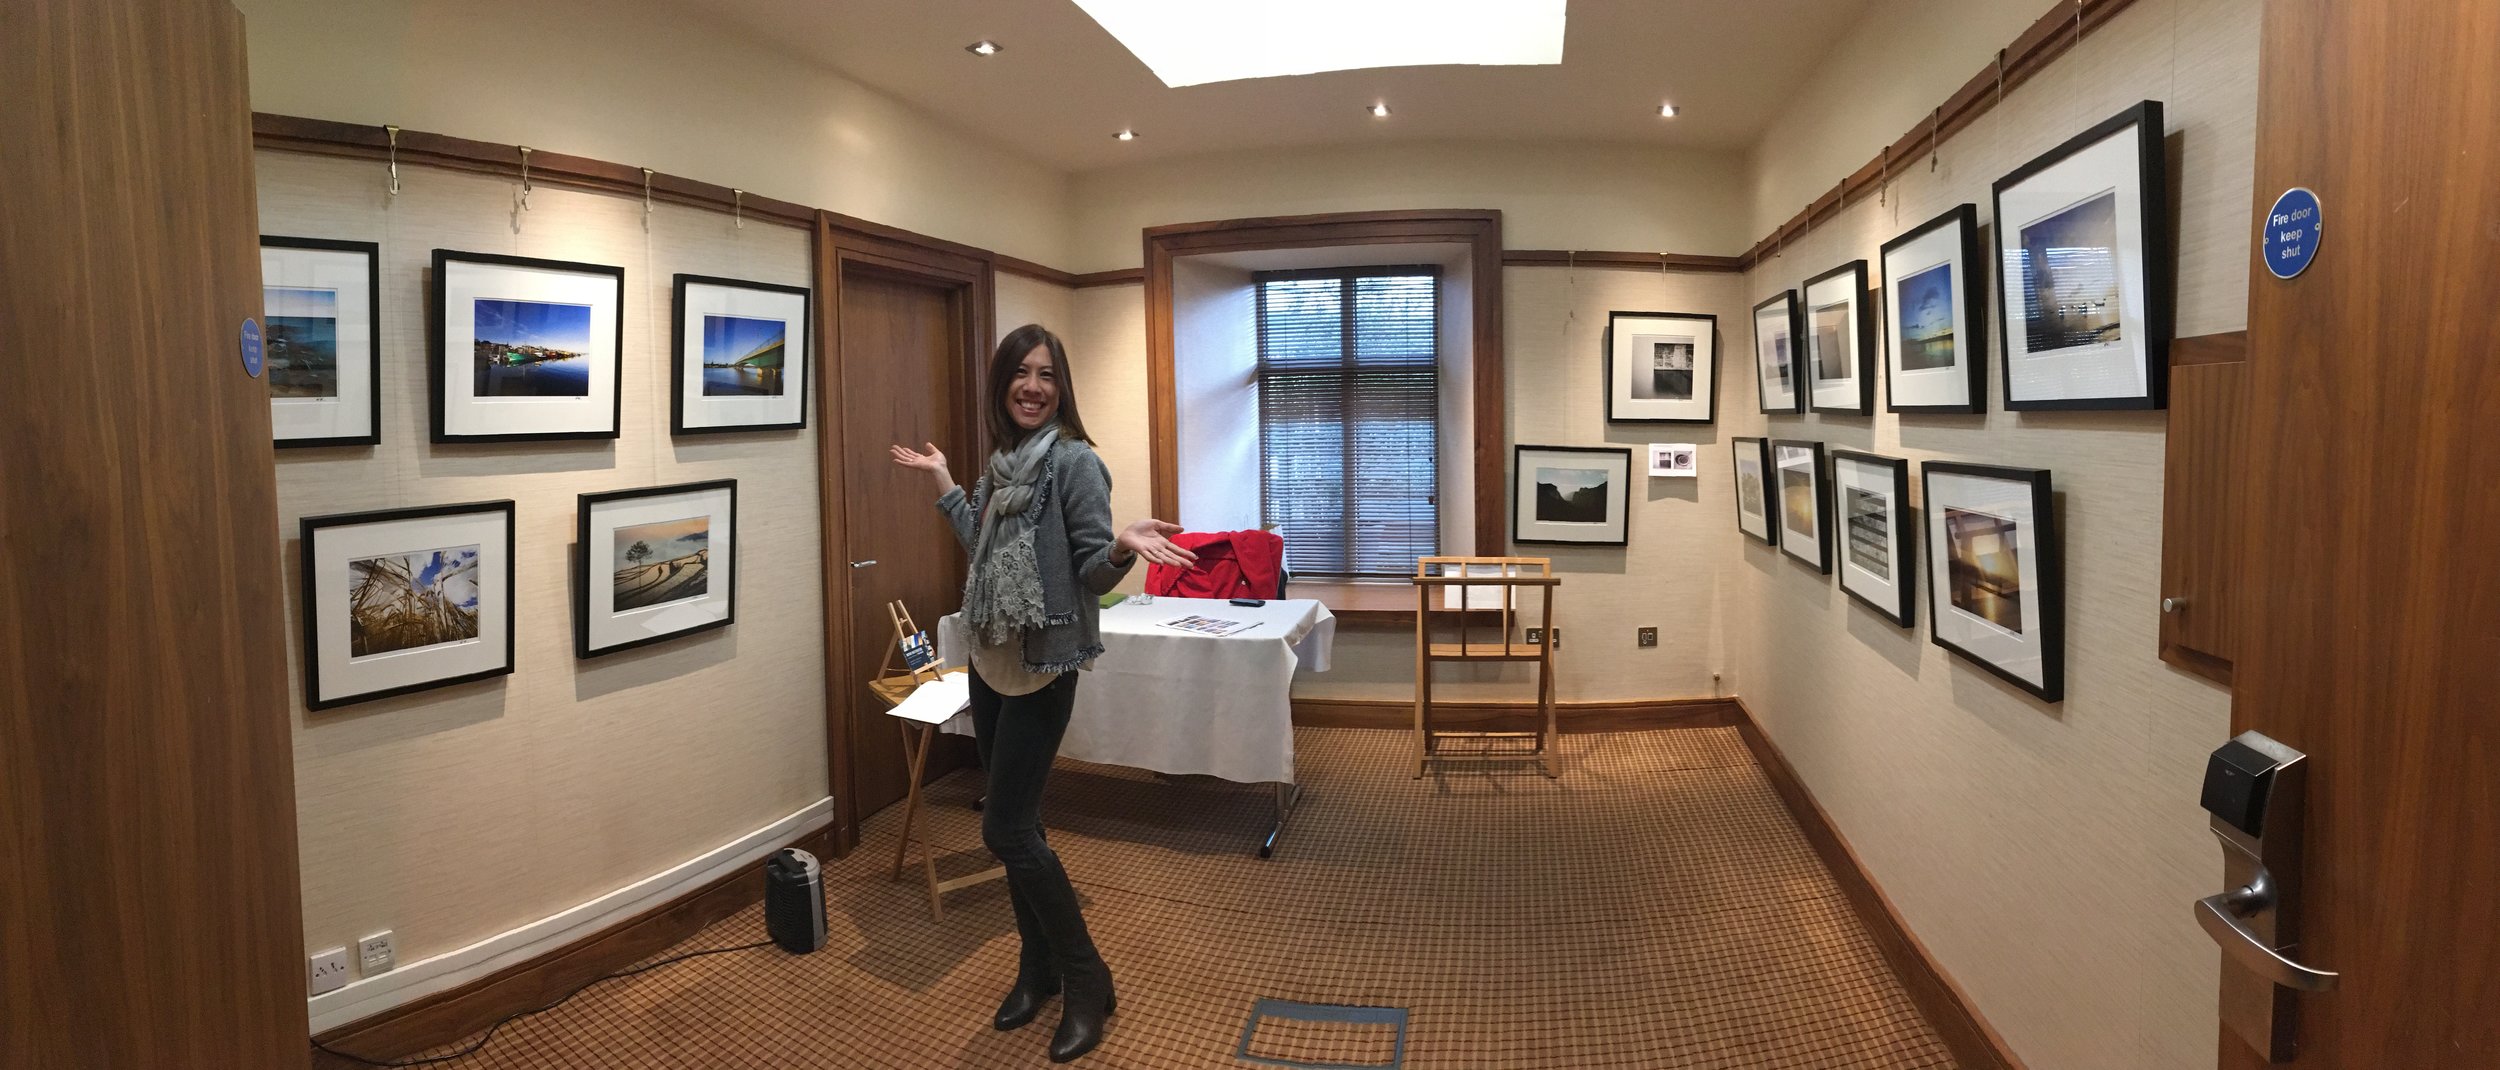
Setting up the room
The artist Margaret Kent occupied the room for a little over the first week of the festival. I wandered in a few times in the preceding days, to see how to hang and display. She allowed me to borrow her hangers and the display rack, which was exceedingly kind. In setting up the room I didn’t really have a feel for what arrangement would work best and really did it in a hap-hazard order. I decided to do two rows of photos, staggered, as this was the most stable arrangement with the hangers and supports. My wife, Claudine, came to the rescue to make it all look pretty and conceal the extra hanging wire. We managed to get everything hanging in a couple of hours and almost ready for visitors. Unfortunately, I had not ordered the cellophane bags for the mounted prints, so had to make a separate order to Strand Framing for this. In the end I just brought in the unwrapped photos anyway.

Mid set-up
Exhibition Proper
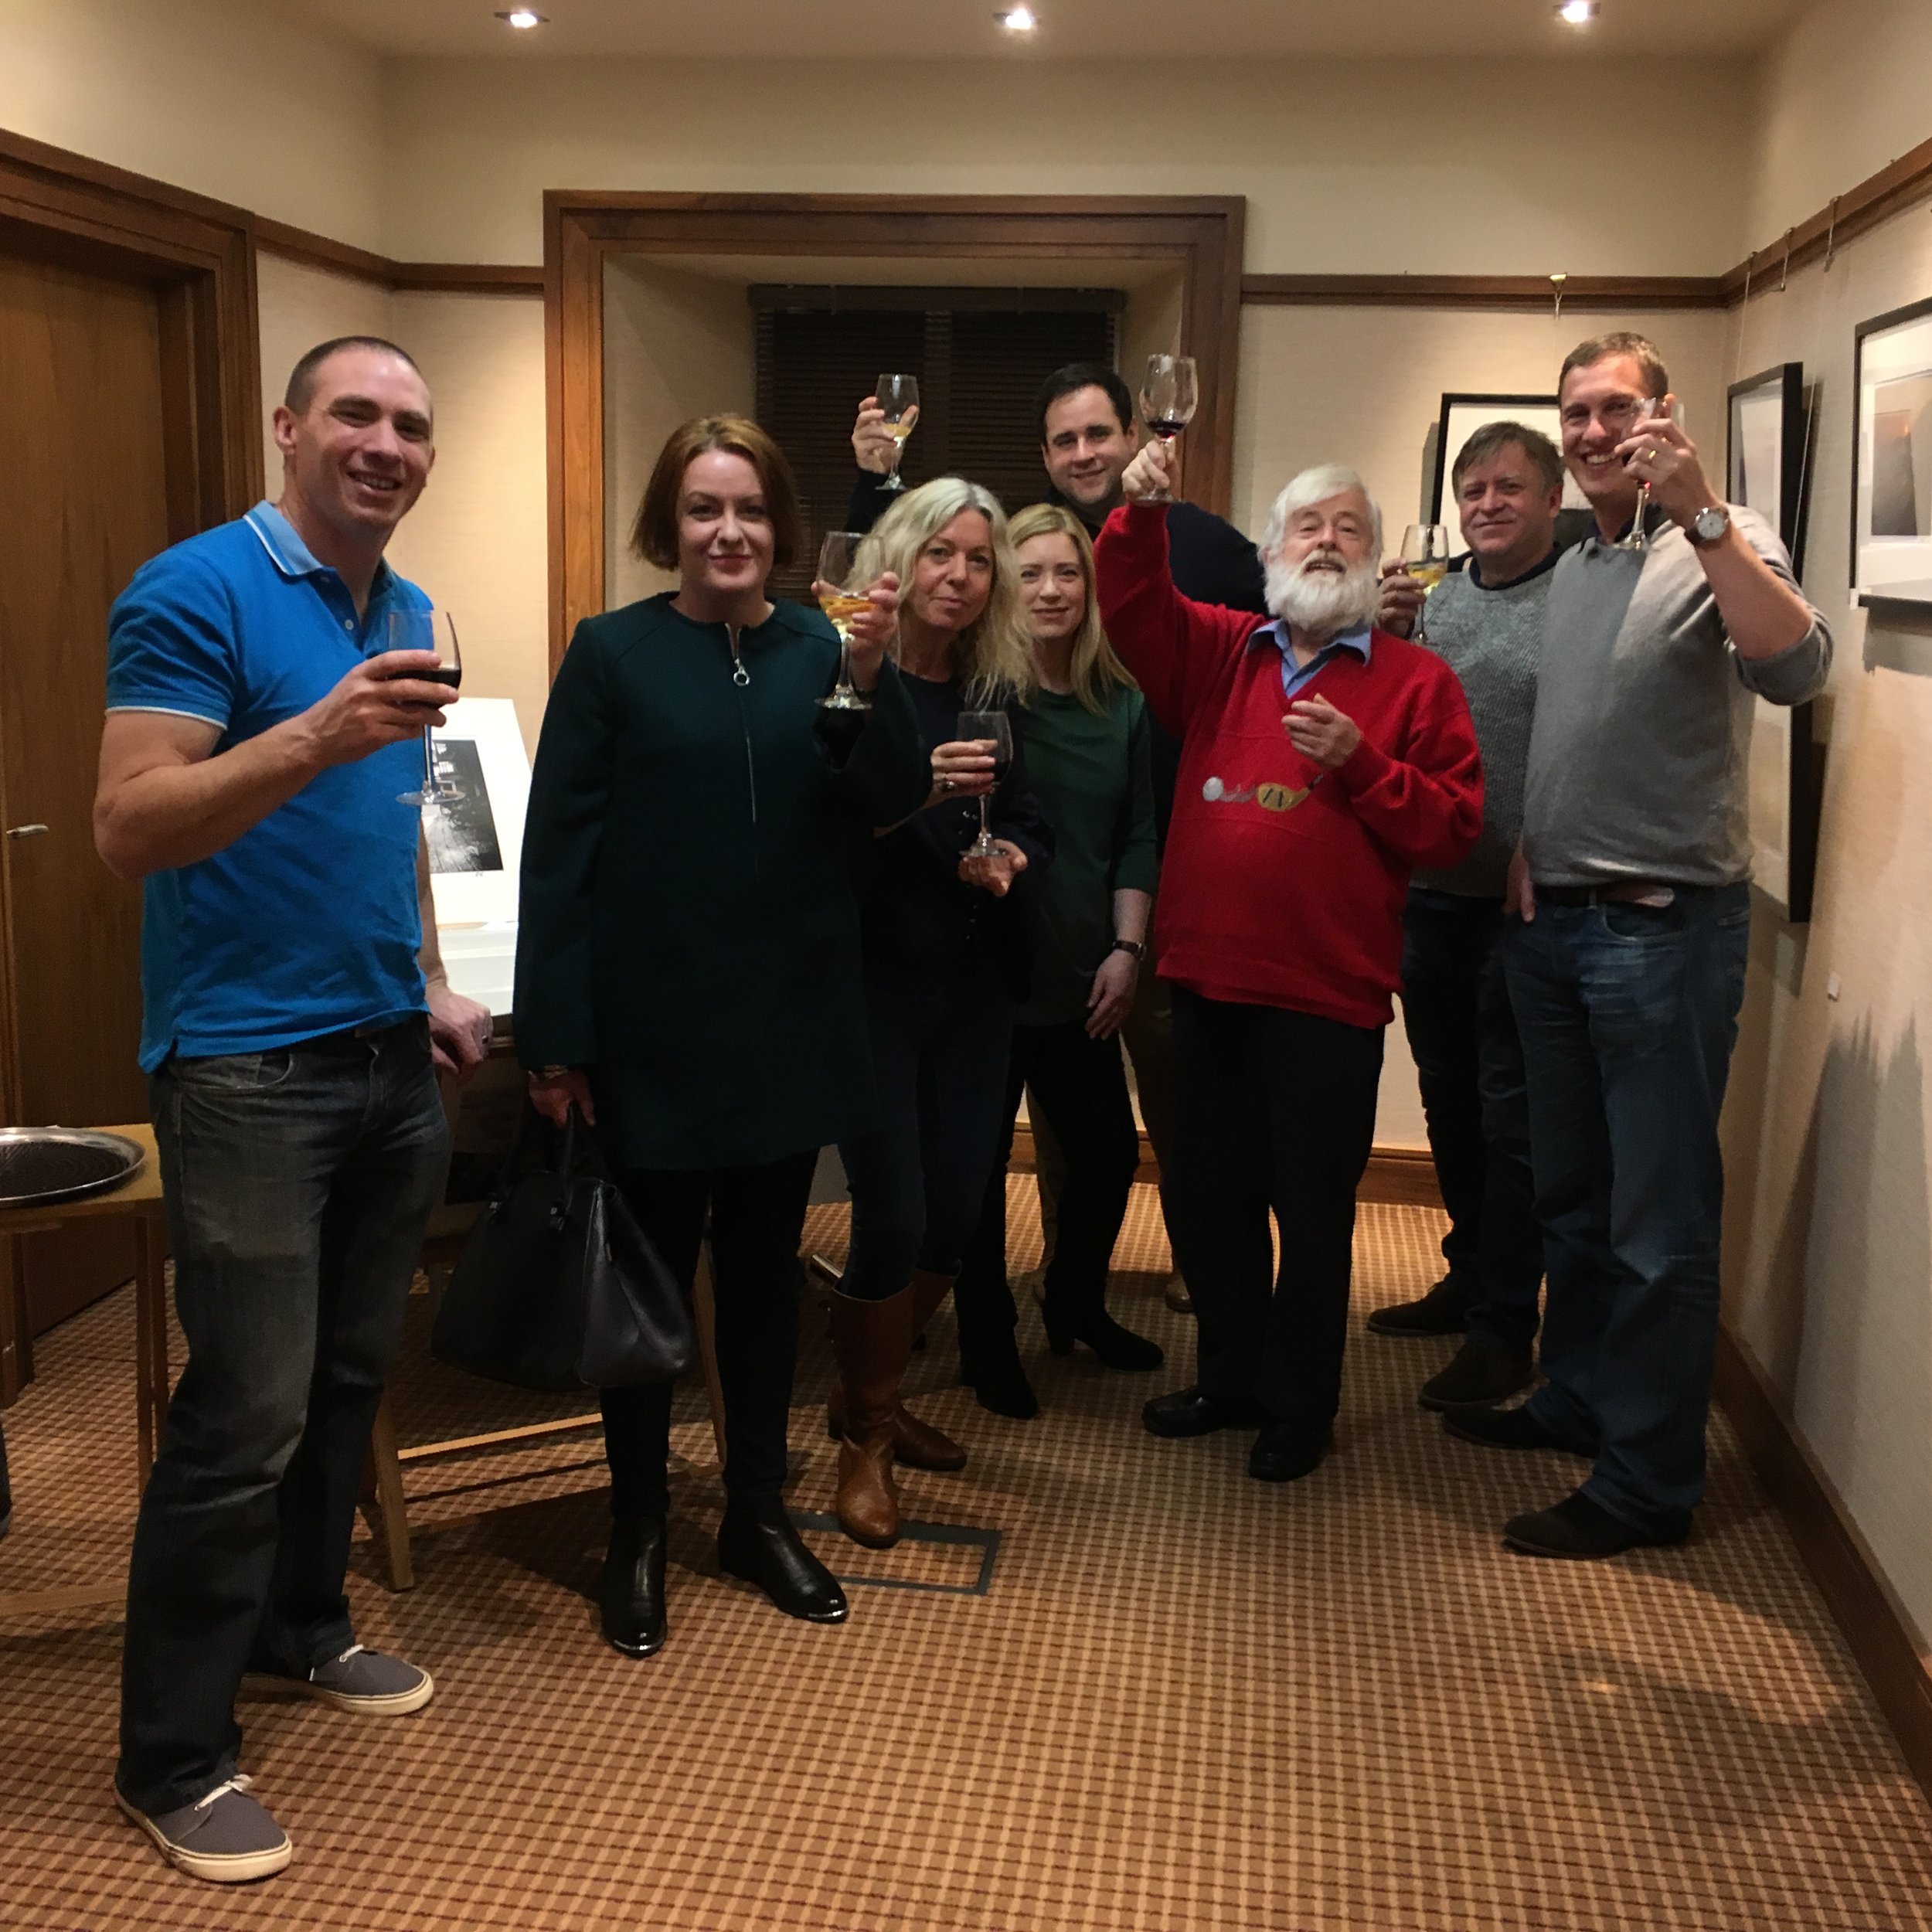
It was rather exciting at first having people coming in and admiring my photos. The camaraderie on the floor was uplifting. Margaret was very friendly in the run up, I had been in to see her several times to see the room and look at how I would hang everything, and she was very kind in allowing me to use her hangers and display rack. Darragh Treacy was in the adjacent room, also very supportive. Beside Darragh was Danny Brennan, a wizened artist who’s been round the block many a time. He was great in giving me advice about how to sell and promoting myself in the hotel foyer. Later on the in the week some old friends dropped by for an informal opening followed by dinner.
All in all the total cost was €1,526, fairly much what I had limited myself to.


Lessons Learned
Use standard frame sizes. If at all possible use standard frame sizes. It makes mounting photos much easier, also if anything goes wrong, standard sizes are much more easily obtained in a hurry. Standard sizes ensure that mounts are more easily obtained and that cellophane bags for mount only are easily obtainable.
Check, double check and triple check the aspect ratios of the photos before printing. I made the cockup of ordering mounts and frames for 4:3 that were actually 3:2.
Selecting a printer that you are confident in is imperative. If you have any doubts at all early on make sure you switch.
Have multiple spares of everything if assembling by yourself. Have at least one whole frame spare for every size. Spare mounts as well. Also, if using standard sizes then glazing is found easily enough on shop ready frames that can be cheap.
Use string across the back for hanging, it gives more flexibility for hanging photos above each other.
Get the little cork pads for the bottoms of frames to stop bumping.
Make sure cellophane bags are ordered if you have mounted only photos.
Don’t do all the same size. Make sure that there are some larger pieces as well as some panoramas.
Don’t do mounted only. Perhaps mounted at a smaller size might have fared better.
Perhaps the technical details of the photographs be included on the label.